Introduction
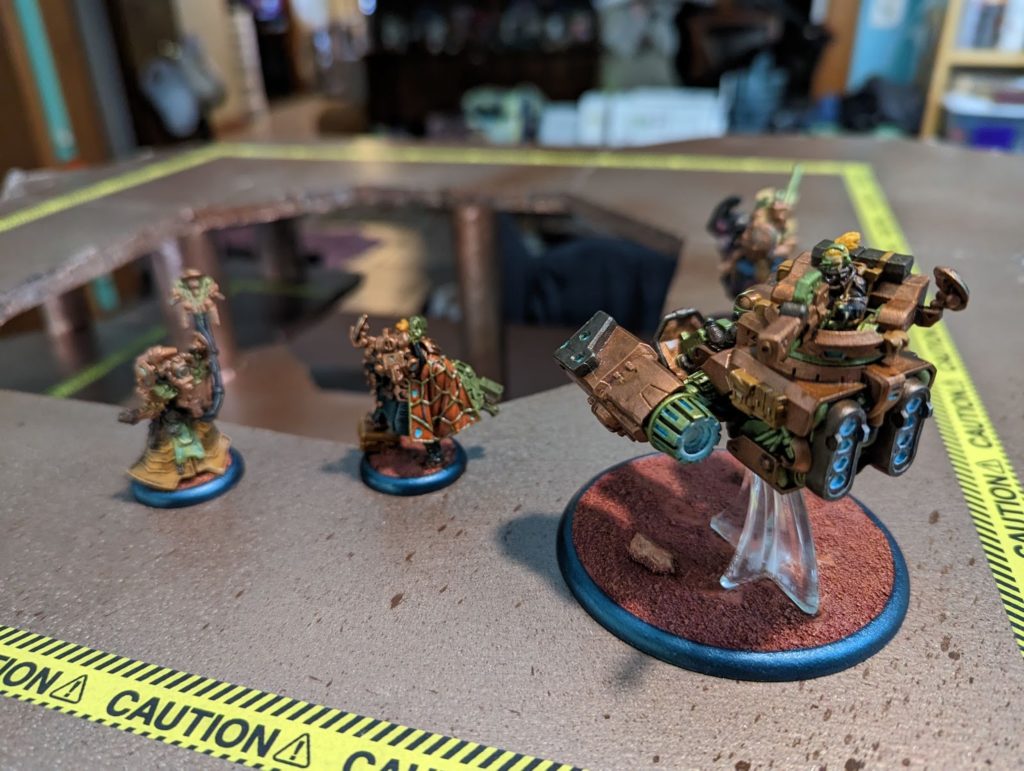
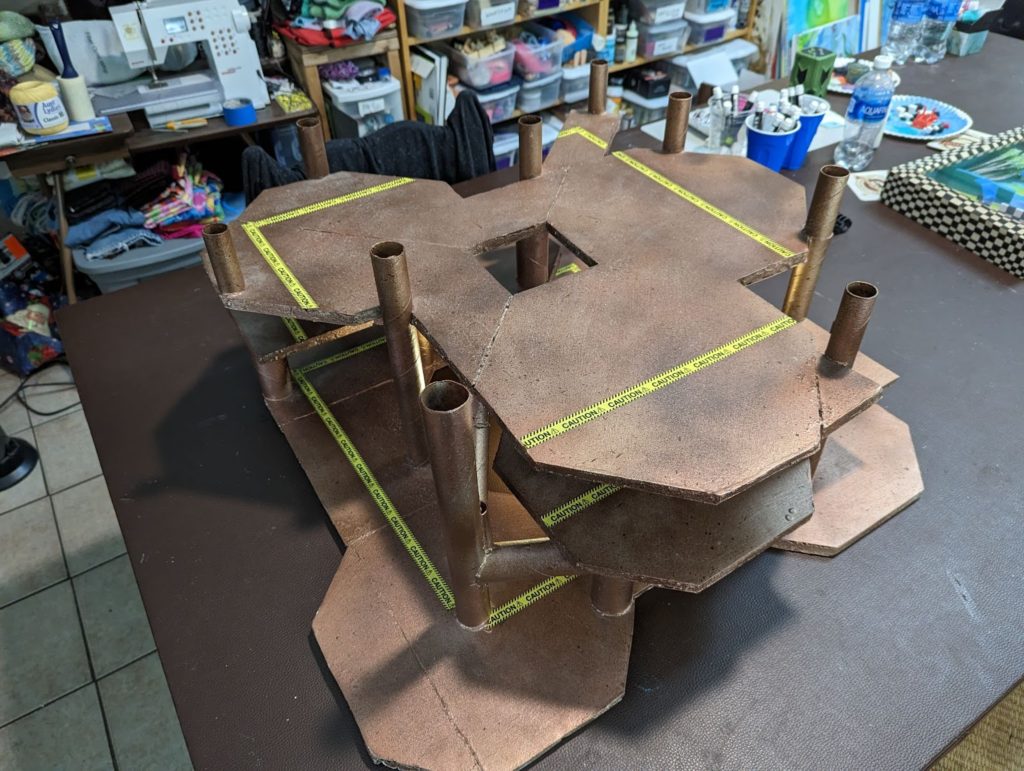
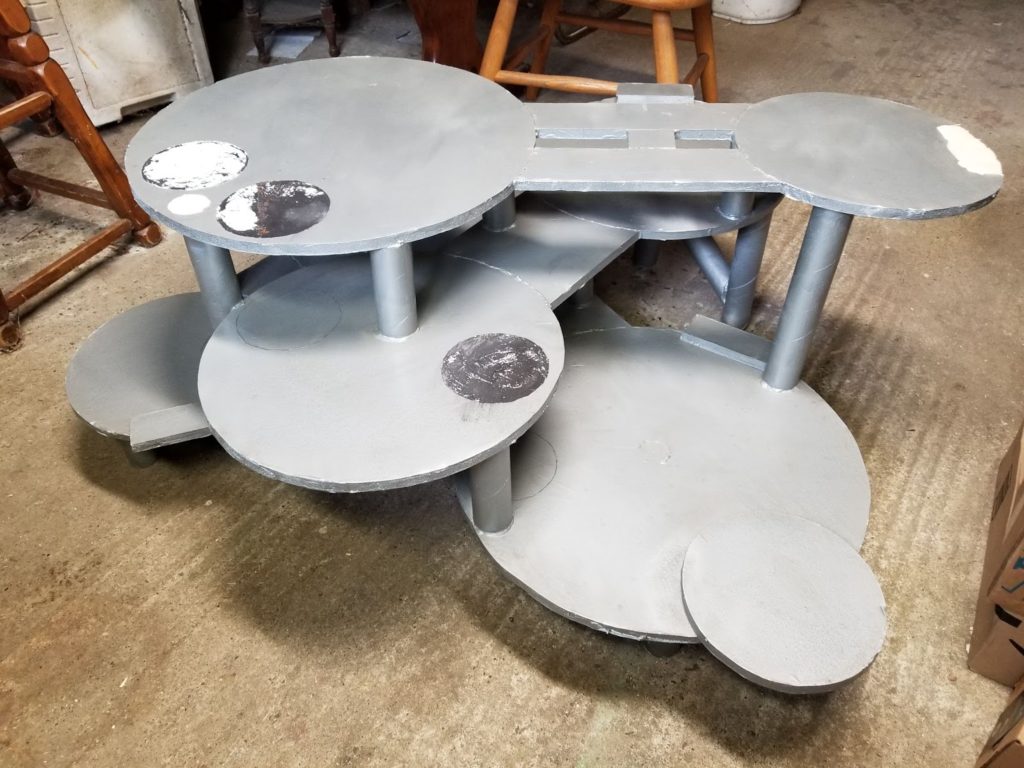
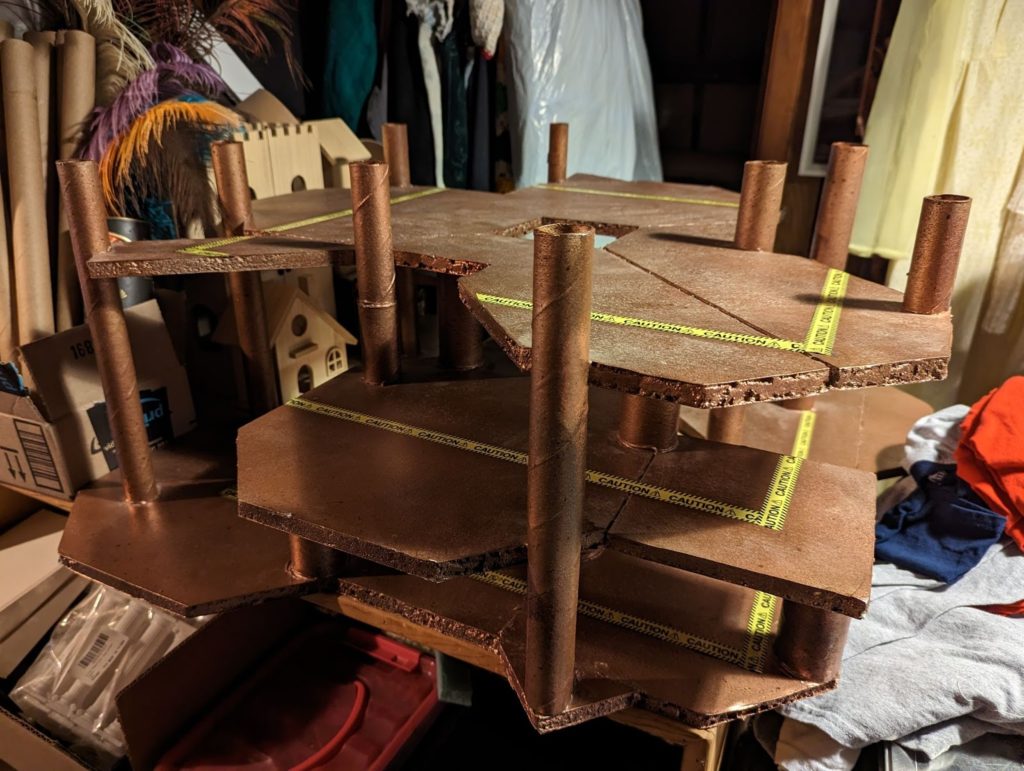
This is my tri-level Skirmish board for Warcaster, loosely themed around my Marcher Worlds army paint scheme. As a Skirmish board, it is roughly 30” x 30”, and stands about 10” tall.
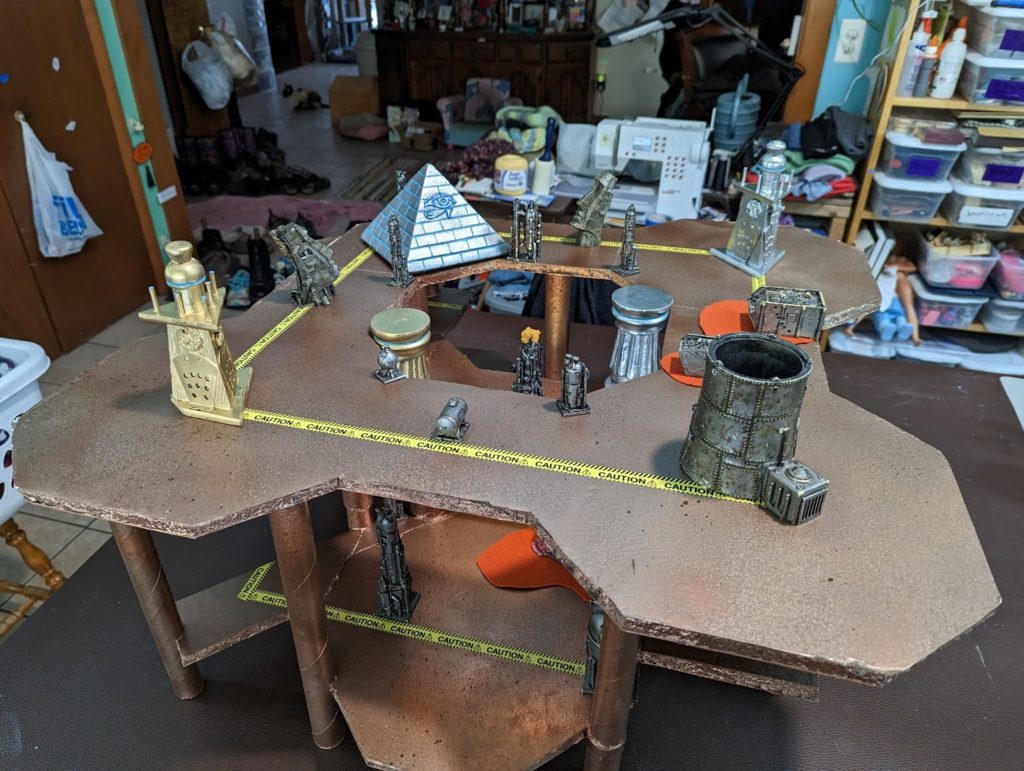
The edges are irregular, so I have added a caution tape around it to denote where the 5” deployment line is on any given side. It also kind of fits the character of it being some kind of space platform or whatever.
The board can also be played upside-down to offer another layout, making the bottom of the pillars into exhaust stacks or something of that sort.
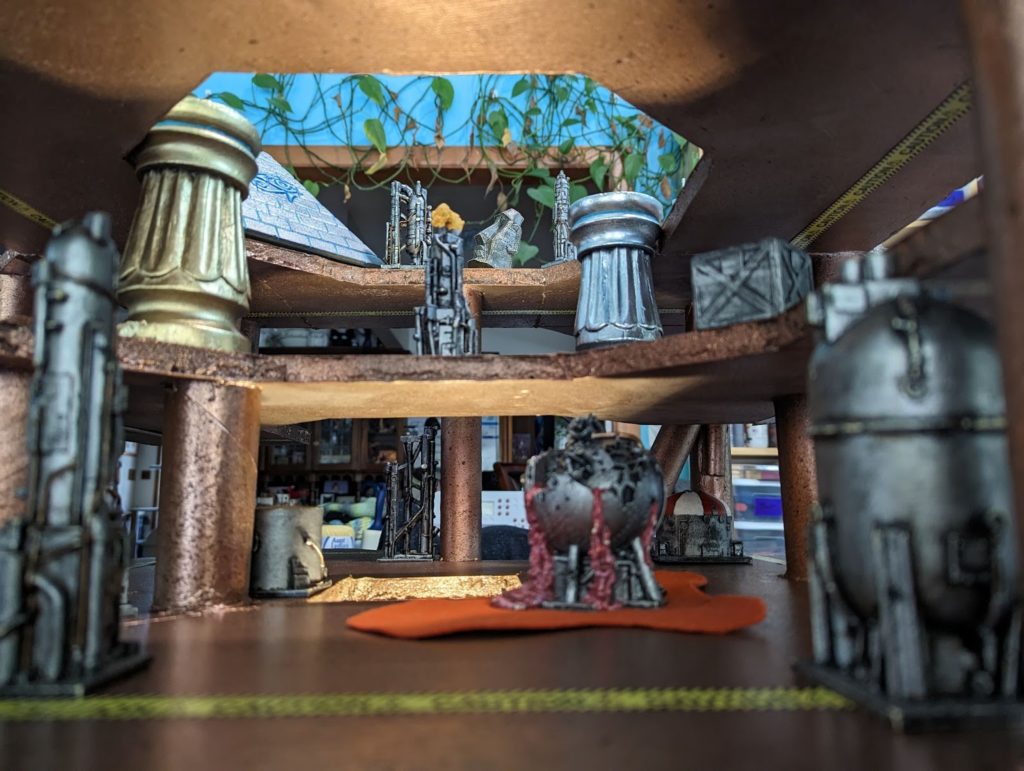
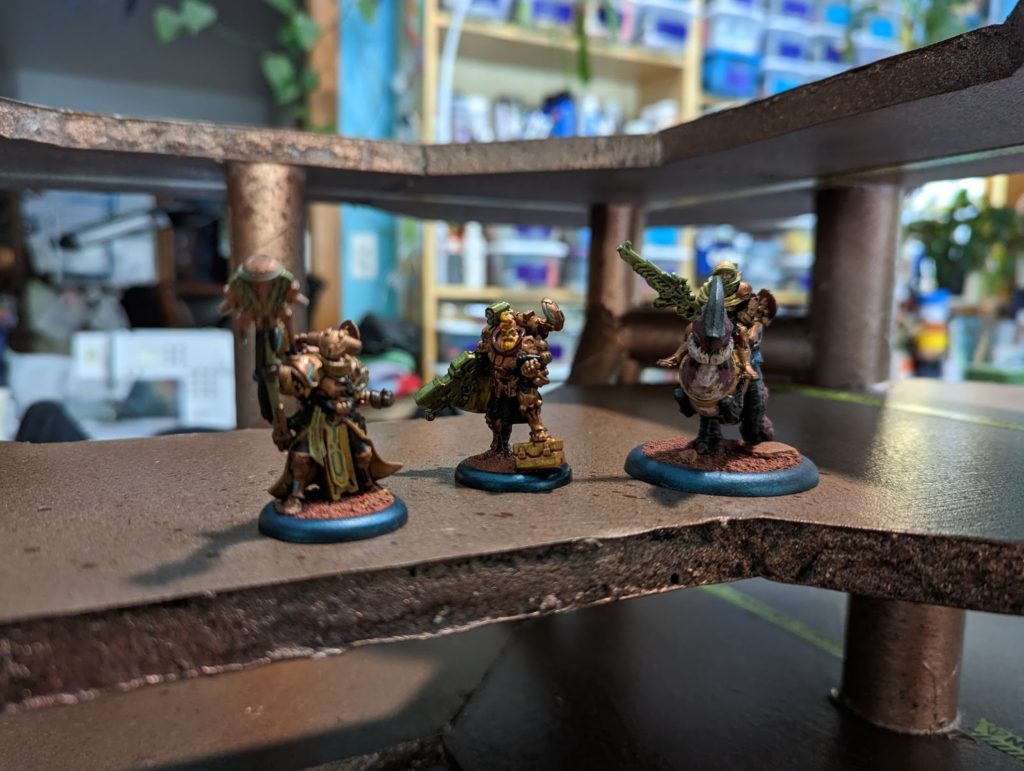
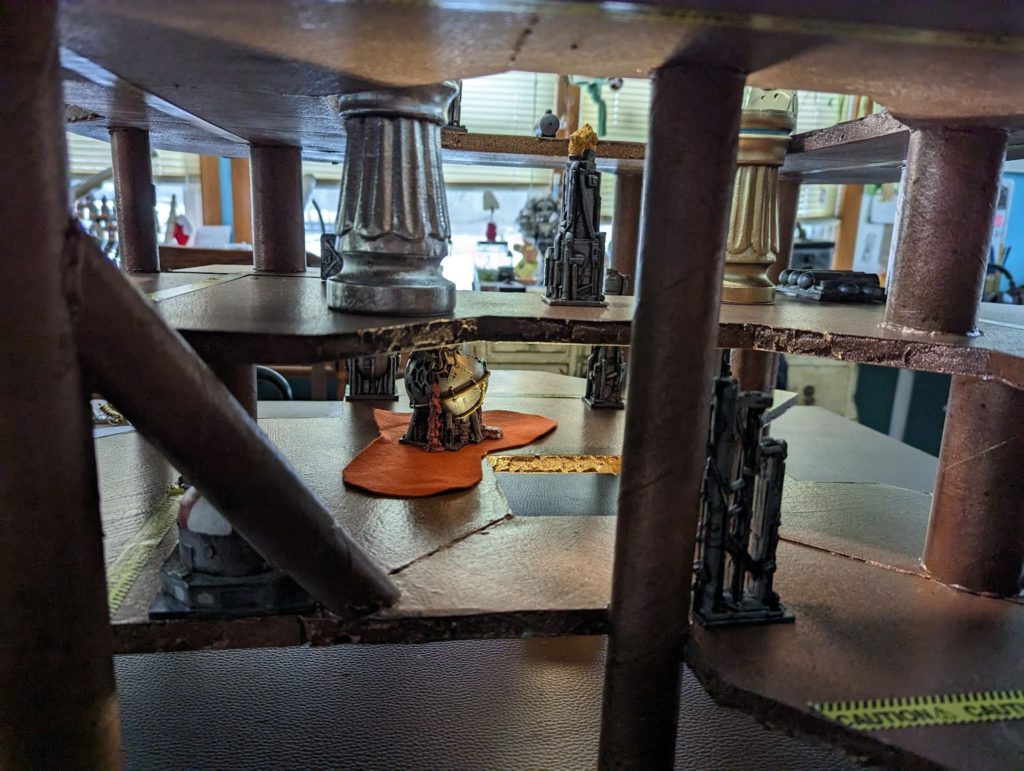
It is tall enough between levels for vehicles to fit pretty comfortably – though the overhang of the level above does make it kind of dark.
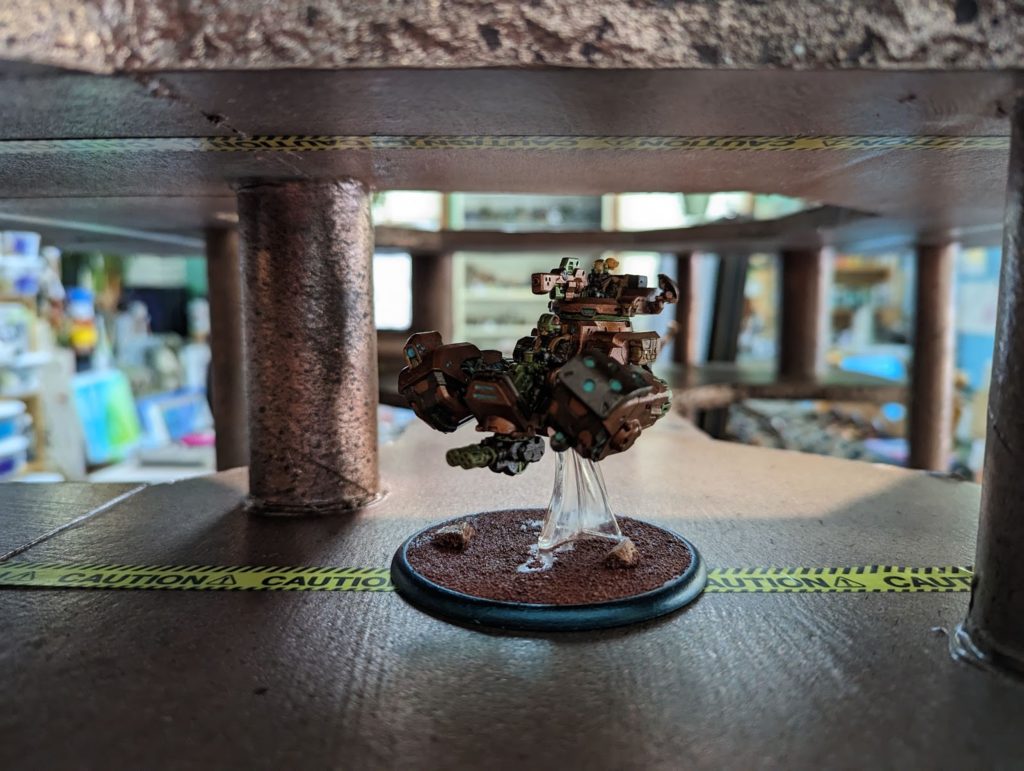
Normally we play “grappling hook rules” for changing between levels: we treat all edges as if they were a nearly-vertical stair. Models switch levels at the cost of 2” when they are on an edge or partly underneath one. The rule came from what I did in Star Wars, where it seems like every character has a grappling hook handy. My buddy has also interpreted it to be like a space station with zero-g and magnetic boots so models can hop between levels. Whatever the fluff of it, the game mechanics work out nicely to treat the whole edge like a Stairs.
I haven’t tried it out yet, but I have painted up my Riot Quest Spawn Gates with metallic spray paint to try out Portals for getting between levels instead of grappling hooks. My thinking was that there were a set of three same-color portals that were all considered the same “staircase” for purposes of movement, but each was positioned on a different level of the board. I like the idea that each player may get to place a set of three with some set of stipulations as to how close they can get to objectives, table edges, or each other.
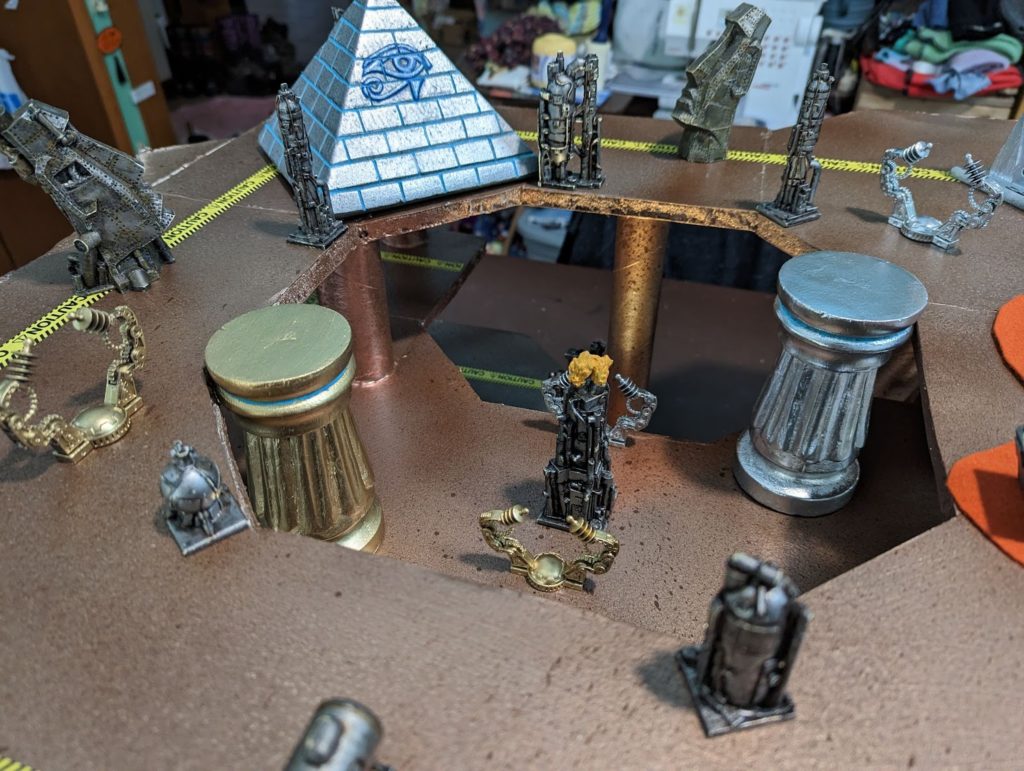
Gameplay on this board is just a blast! The multi-levels give you some neat options to sneak up on positions by using the level above or below it. And of course there are a bunch of exposed edges to tempt you to slam models off the edge. I have seen many models (and Void Gates!) slammed off of a narrow bridge, though this doesn’t happen as much these days (as everyone has upped their game).
I want to share some of the thinking that I put into this board to inspire others for what is possible within Warcaster terrain rules. While this wouldn’t be a play-by-play tutorial of how to construct a board like this, I hope sharing some of the details I went through can encourage others to try crazy terrain like this of their own.
Original Inspiration
Years ago I ran a Star Wars RPG campaign using their d20 system, and being a super big fan of Warmachine at the time, I incorporated a bunch of Warmachine miniatures into my RPG scenarios. Eventually I started running large-scale battles using Warmachine model rules as stand-ins for characters in Star Wars, such as Khadoran Warjacks as Republic Wardroids and Winter Guard Infantry as Republic Soldiers with blasters. It worked WAY BETTER for running actual Star Wars than d20 could ever hope to with its standard rules, and opened up some interesting terrain options due to the wide range of worlds that are present in the setting.
For one of those Star Warmachine battles I constructed this awesome board to be a floating manufacturing facility.


This was intended to fit in a roughly 48” x 48” space, and was a lot of fun to play on. I have also played Warcaster on this a couple of times when I feel ambitious enough to dig this out of my garage. It is not easy to store, and just barely fits through doorways if I do it correctly.
For my new Warcaster board, I wanted to see if I could leverage the feel of this board, but in Skirmish size.
Design
Looking over the Skirmish scenarios I tinkered around with level shapes some to make sure there were multiple options for placing objectives on multiple levels. I also tried to consider practical details as well, such as being able to reach into the inner portions of the board to move miniatures around.
From prior terrain work I knew that having all of the levels glued together was my best option for stability, even though it meant less configurations for the board. What I lost in terms of flexible configuration I gained in stability for transport and storage. Even with a fixed design for the levels I could still rotate the board in one of four different facings, put objectives on different levels, and even flip the whole board upside down for a change of scenery. In my mind, I figured if the board ever got boring I could always build a new one or make a second portion to connect to it – so far I haven’t gotten bored enough to warrant either option.
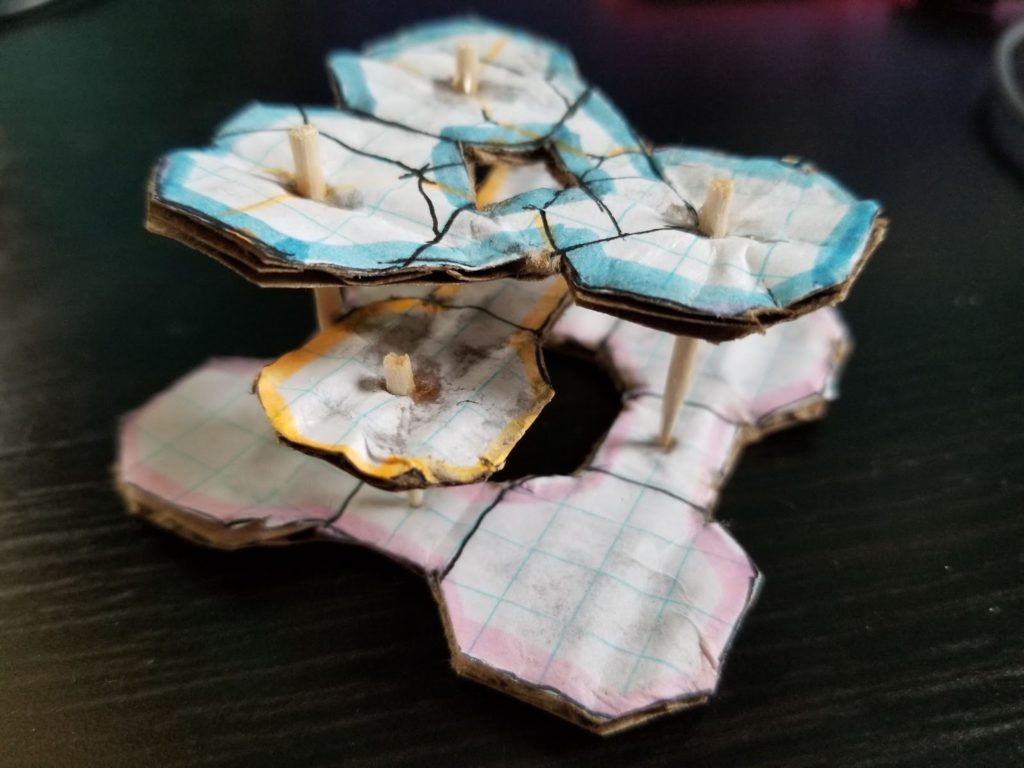
Small scale prototype
To verify that I liked my design I made a copy of this basic design using cardboard with grid paper glued on it, just to make sure the shape seemed logical enough. This also helped me in designing how to cut out the pieces for this board from separate foam core pieces without waiting a lot of material. While it wasn’t perfect, it gave me enough confidence in my design to go full scale with it.
Construction
This is a high-level synopsis of how this was build:
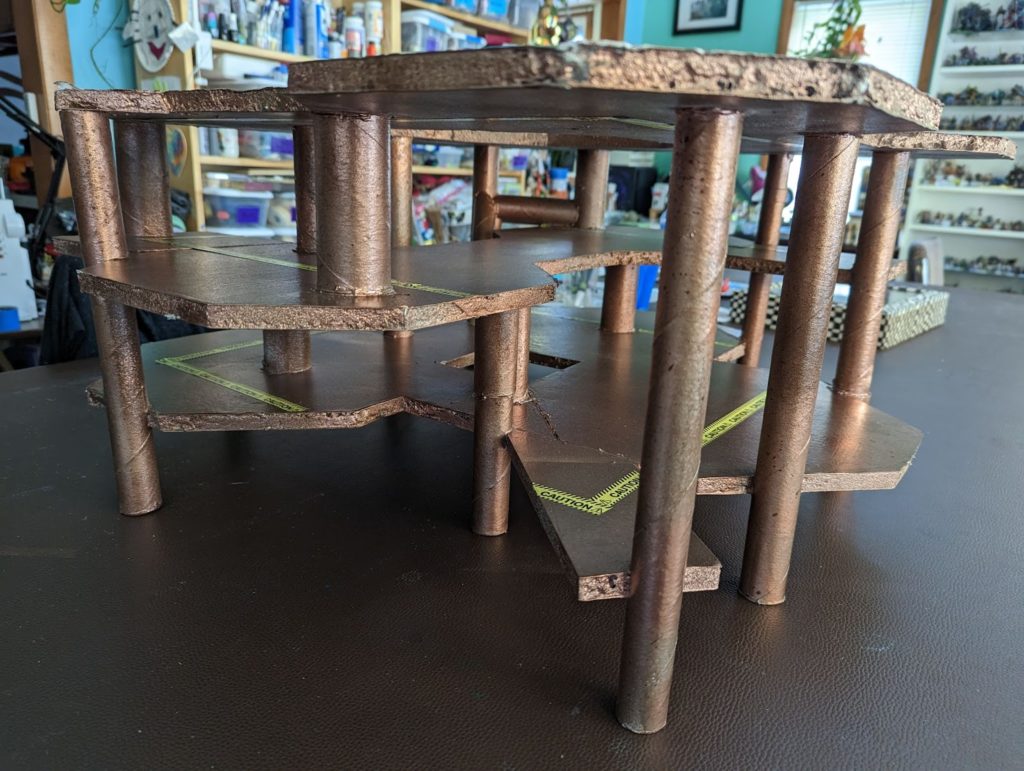
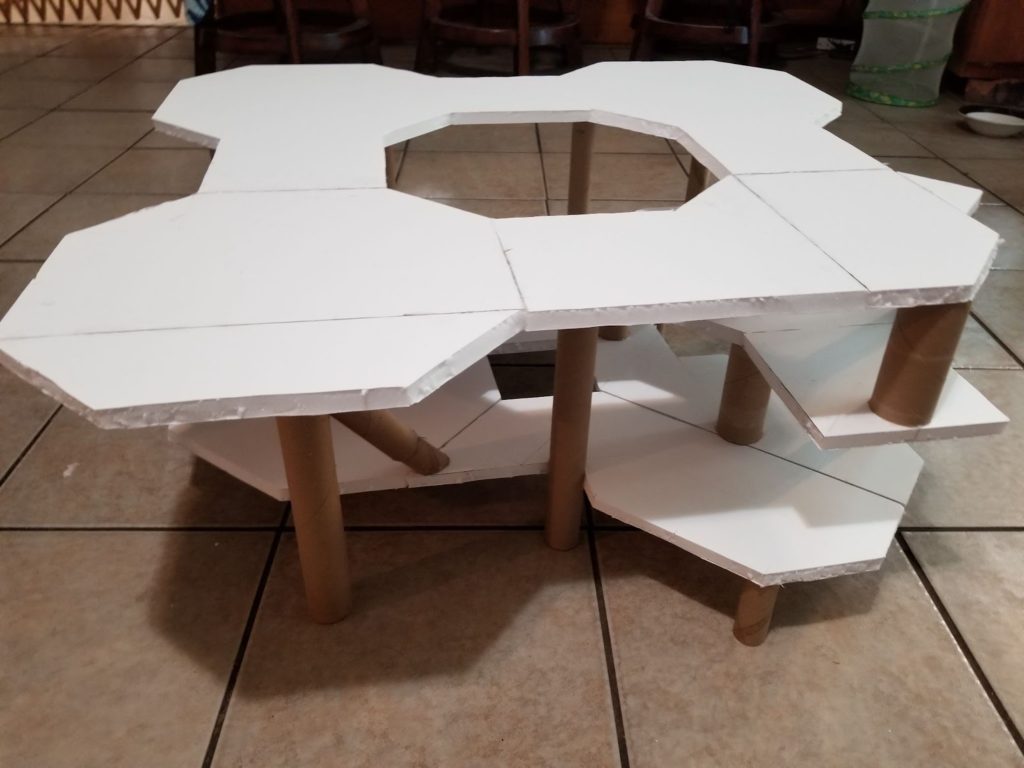
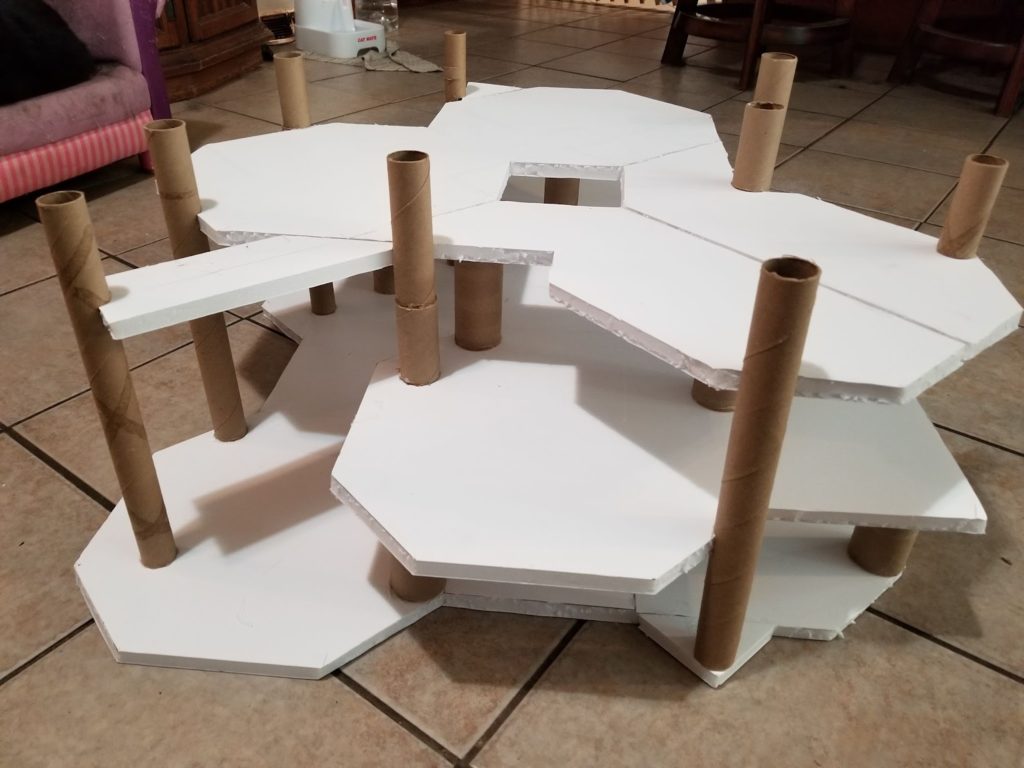
- Materials: The levels are made from ½” foam core, held up with toilet paper tubes and the cardboard tubes left over from aluminum foil rolls. In a couple of places I cut notches out of the cardboard tubes to make the foam core fit for a better hold.
- Assembly: Most of this is held together with hot glue between the cardboard and the foam core. When I needed to join two pieces of foam core together I used toothpicks inserted into the sides to span the two pieces like miniature rebar. Hot glue secured those joints as well.
- Basecoat: Once the glue was dry and settled, I coated the whole structure in Kilz 2 acrylic primer. This took a while, and I did a couple of coats in a lot of places to make it all work. The edges where the foam core was exposed was notably stubborn to get coated fully.
- Spray Paint: Without the Kilz my metallic spray paint would have eaten away at the foam core … but as is, it worked out to give the whole thing a slick sci-fi finish. I wanted it to look a little weathered, so I ended up doing multiple layers of metallics to get the look I achieved. A lot of them were hammered metallics, which leave a texture on their own without my help. Throwing in some flecks of a brown topped off the look nicely.
- Deployment Zone Tape: This was a very-recent addition to the board: a line of Caution Tape defining the line that is 5” from the edge of the board. Having this measurement available helps a lot with knowing the proper deployment zones, as there is no clean line along all outer edges for most parts of the board.
Transportation and Storage
For me, the hardest part of having cool terrain is storing and transporting it around. I did think about keeping this board design narrow enough to fit through doorways, but it’s still kind of rough to store this terrain.
It fits on top of a ~26” deep cabinet if I angle it just right. This is not ideal, as it gets very dusty sitting out like this.
Carrying it hasn’t been too horrid, as I lucked out and found one of the pillars makes a reasonable carrying handle if I am careful with it.
Lessons Learned
I learned a lot by making this board, and definitely would do things differently were I to make another one like this again.
- Minor Modularity: It wouldn’t be too hard to recreate the feel of this board using squat tower pieces that I could stand near one another and span with bridges I drop in place. If I did it out of maybe 3 large multi-level pieces it wouldn’t be too hard to shift them around for even more board combinations.
- Better Storage and Transporting: I would probably design such a board to fit in a box so I could carry it around easier.
- Pre-Marked Deployment and Scenario Points: As mentioned, the caution tape for deployment is a late edition to this board; were I making this board again I would have planned for this sort of marking earlier in the construction. I would also work out pre-drawn circles to show where objectives need to sit (also handy when they get bumped and need to be reset).
- Lighting: With the top level being so large, it often casts a shadow over the lower levels, making it hard to see your models at times. I have added a small light to help, but it can only do so much.
Conclusion
I hope you have enjoyed these photos and origin story of my multi-level Warcaster Skirmish board. Terrain really is something that can make a good game even better, and is a neat opportunity to express your own take on the Thousand Worlds. I encourage you to take inspiration from my triumphs and mistakes with this board to make your own Warcaster battles even better with multi-level terrain!