Today, a madman will teach you his Creative Process ™! I have done my share of scratchbuilds and kitbashes, and plan to make more custom Warcaster objectives, but today want to encourage people to just start something without knowing where it will go.
When doing something creative you don’t need a map of what you’ll do: you just need an idea, and a willingness to try something that you think will get you there, then reassess. Even if each “throw” is inaccurate, if you keep checking you are going in the right direction and willing to course correct (and even reverse parts), you should get somewhere interesting. And being laidback about the result makes it more fun as you surprise yourself, and lets you try many small simple things to learn quickly.
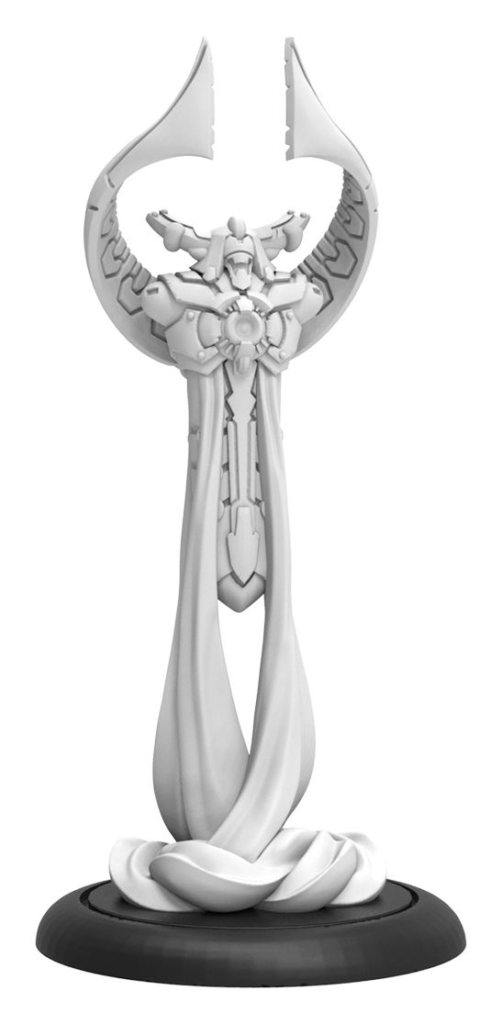
I wanted to make an objective, and it was almost Halloween, so used that as a starting point. This gives me my vision, and this part is important as it gives me a target to “Throw” towards. My vision is “a 20mm based objective that has themes of both Warcaster and Halloween”
My first thought was something about pumpkins growing on arc crystals, but when I asked on the discord I got a suggestion to make an AC Techno-coffin. That is a perfect blend of Warcaster and tacky Halloween staples. My first thought was using Raxis’ body design as inspiration for a coffin
My first thought was something about pumpkins growing on arc crystals, but when I asked on the discord I got a suggestion to make an AC Techno-coffin. That is a perfect blend of Warcaster and tacky Halloween staples. My first thought was using Raxis’ body design as inspiration for a coffin to a powerful Hieretheos, then surrounding it with skulls that wanted to bask in the lingering energy of the master.
In another tutorial, you would now see a sketch of the end result, and a photo of all the tools and parts perfectly laid out. This is not THAT tutorial.
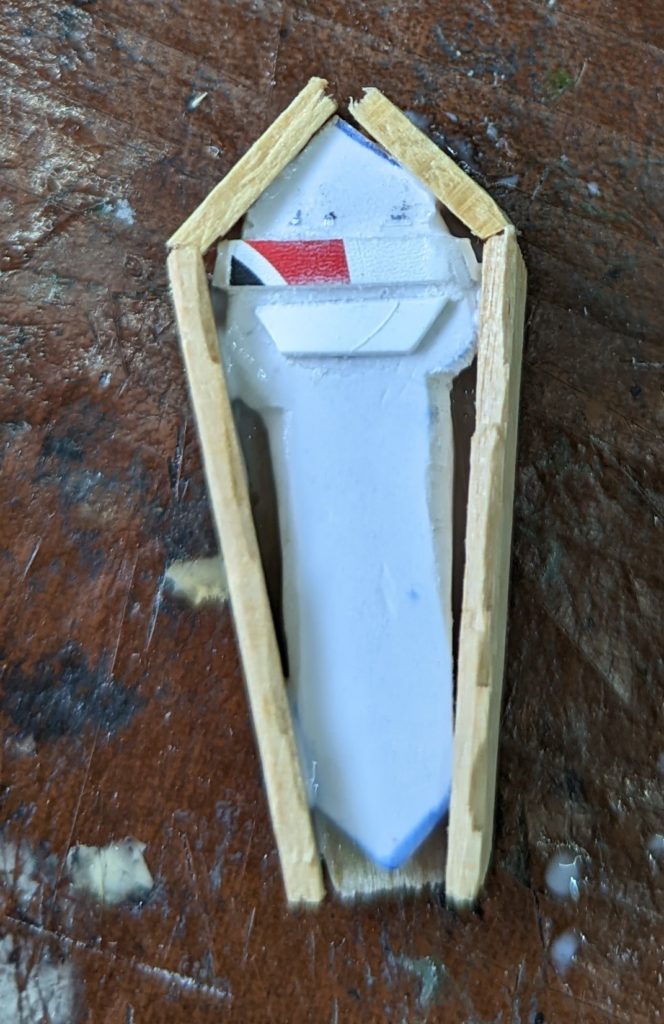
Throw #1: Carve main body
I found some plastic used for drawer dividers. It is 5mm thick, with a smooth top and bottom, but a rough side once cut. I have used it for chunks of concrete, where the roughness looks like ripped up chunks of rock. I drew the rough shape I was going for, then cut with a hobby knife. I also started to carve some bevels along the side. I cut some thin strips of plasticard (in some cases plastic from ice cream punnets) to start decorating – gluing them on with superglue to set up a basic “face” shape.
Assess: One of the strips went all the way around, and I wasn’t happy with how it lined up again (the right edge was a bit of a mess). I liked the shape, but a bit worried it wasn’t going to scream “coffin” when I was finished.
And I admit it: I was feeling lazy, and realised I was setting myself up to do a front and back, as well as the sides, and with the sides a rougher texture that could be awkward looking.
Throw #2: Just build a damned coffin
All my problems were solved by building a decrepit wooden coffin around my core shape. It fits the theme perfectly, keeps the focus on the techno coffin inside, but covers some of the uglier parts. It is also a simple shape and easy to build.
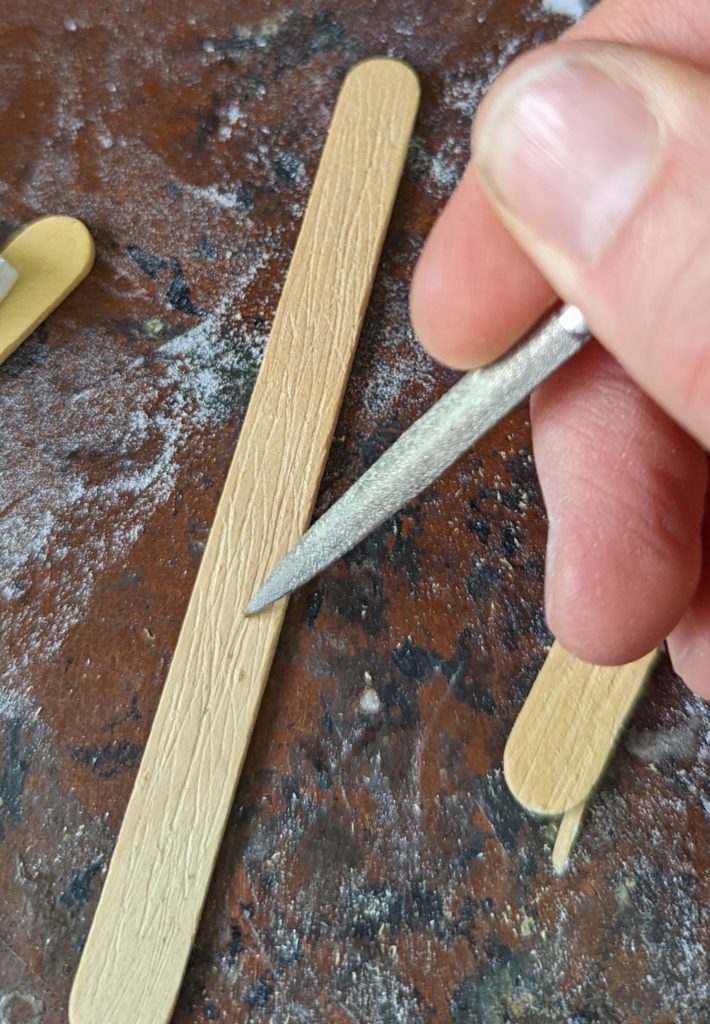
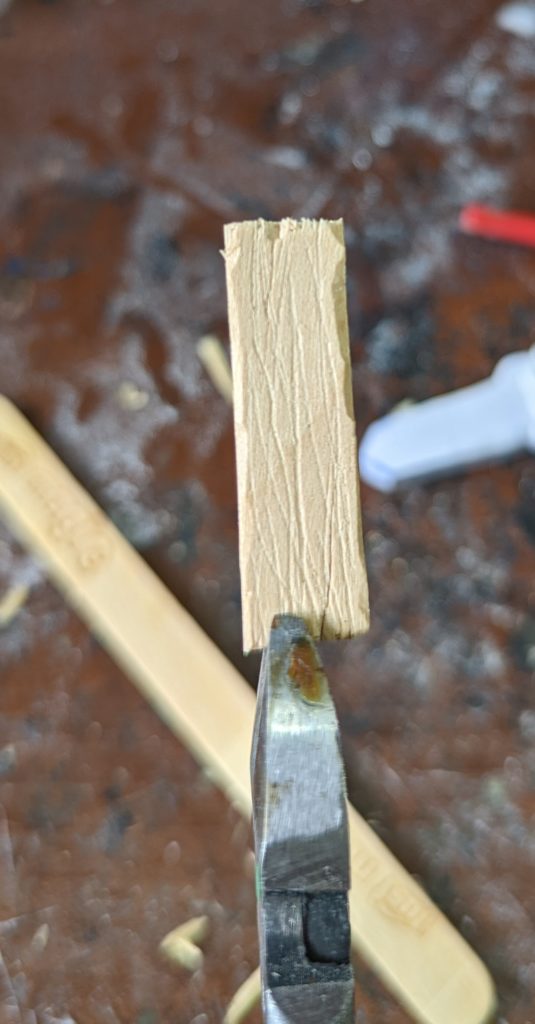
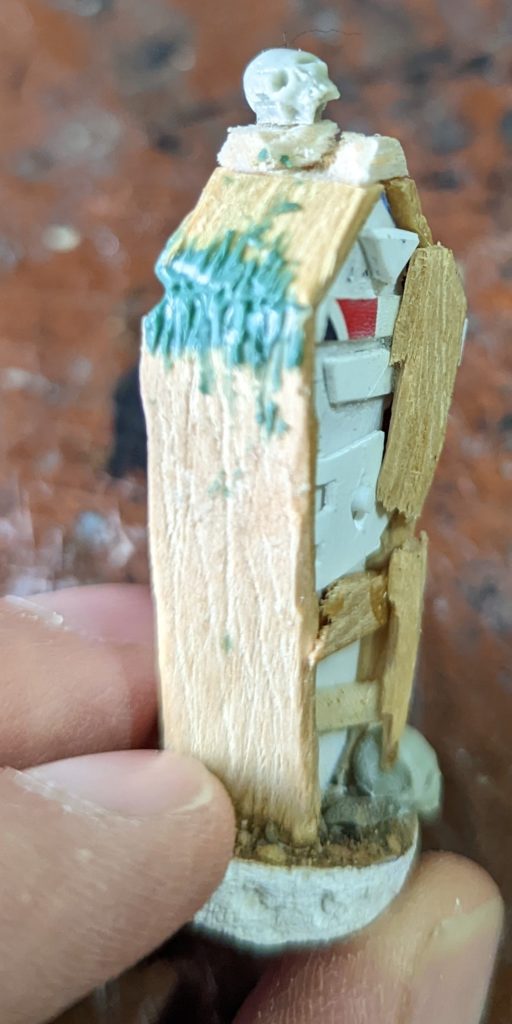
By luck, my plastic coffin was just narrower than a pop stick so they would be a perfect side. Pop sticks are surprisingly smooth once painted, so to exaggerate grain I carved lines in with a needle file (any blunt point would do). I cut each piece to size, then distressed the ends with random cuts from a hobby clipper. I cut the back from balsa wood – after also carving wood grain into it. Finally, I glued all the pieces using PVA glue to the inner sarcophagus.
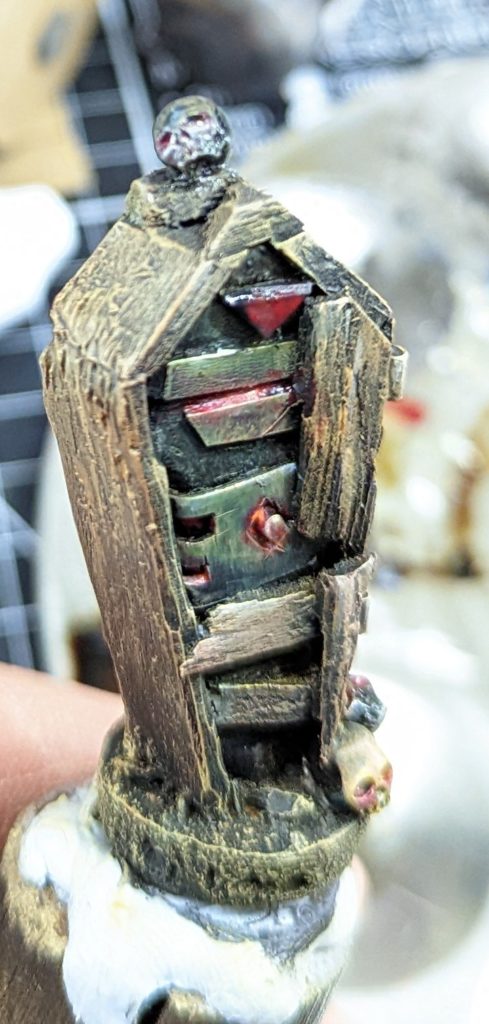
Assess: this was moving in the right direction. There was still a lot of rough work to be covered, and some detail to come, but the core shape was right now.
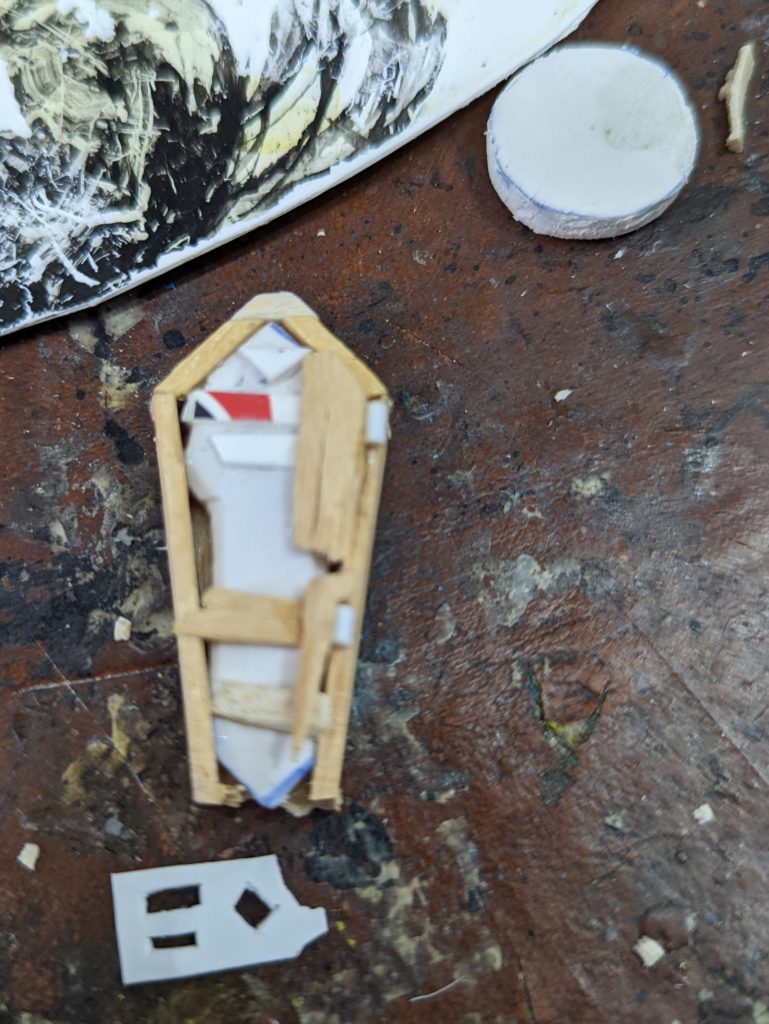
Throw #3: Details
Leaning further into a wooden box to cover all sins: I cut a broken door from pop sticks to cover some of the sins on the right side, and to fill in some of the blander areas in the bottom. Small plasticard rods hint at hinges
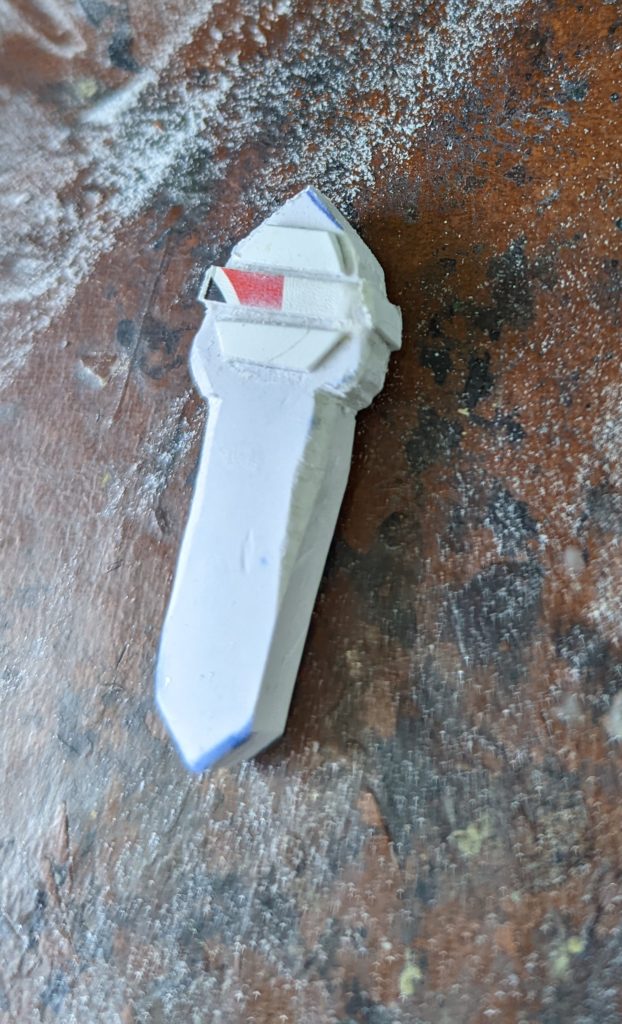
At some point the top strip of the “face” fell off, and I wasn’t too disappointed. I replaced it with a triangle that could carry the AC Logo
The detail of the body was cut from a thin strip of plasticard: you can see it at the bottom of the first photo. Cutting 2 thin lines and a diamond, then carving the right side around the broken lid. I bent a right angle to push it in the left side, and poked the right side behind the door, and when I was sure it would fit, superglued. From this you can see the cunning in the broken door: it saves duplicating the detail down that side, and lets me get away with a rougher style without needing it all mirrored.
I cut a circle of base from the same plastic as the coffin, superglued the coffin on, and scattered the ground with gravel / sand. Finally I glued skulls from my bits box around the coffin.
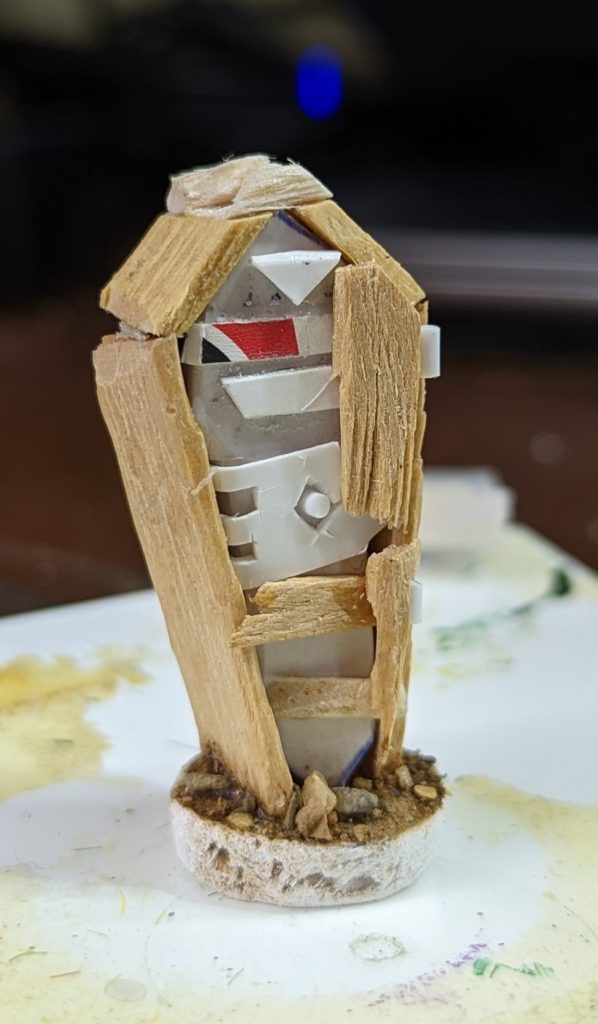
Assess #3: It is shaping up and nearly finished. I walked away convincing myself that I wasn’t bothered by the rough gaps between pop sticks on the left & right ‘corners’ (see picture 2). But it nagged at me, and consistency of thought is not the theme of the day.
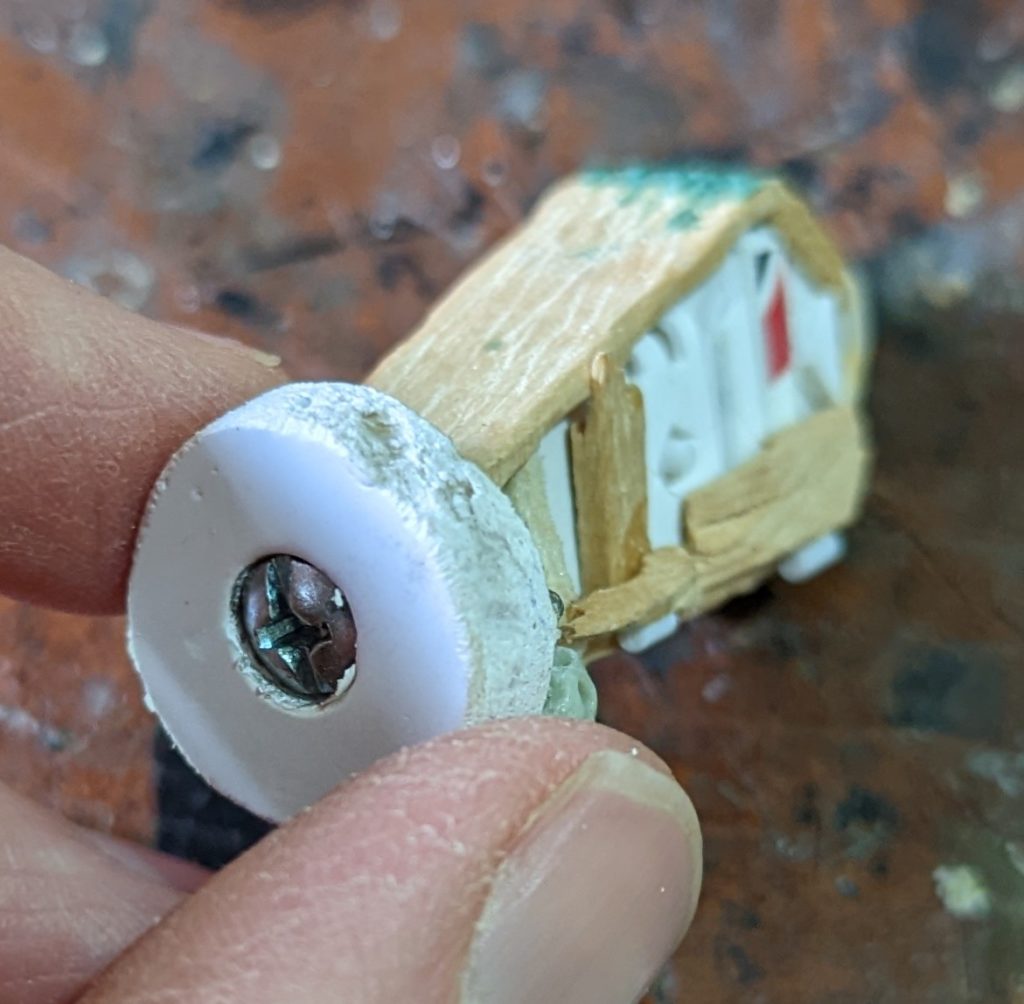
It was also a very light model so prone to being knocked around, and felt a bit weak between coffin and base.
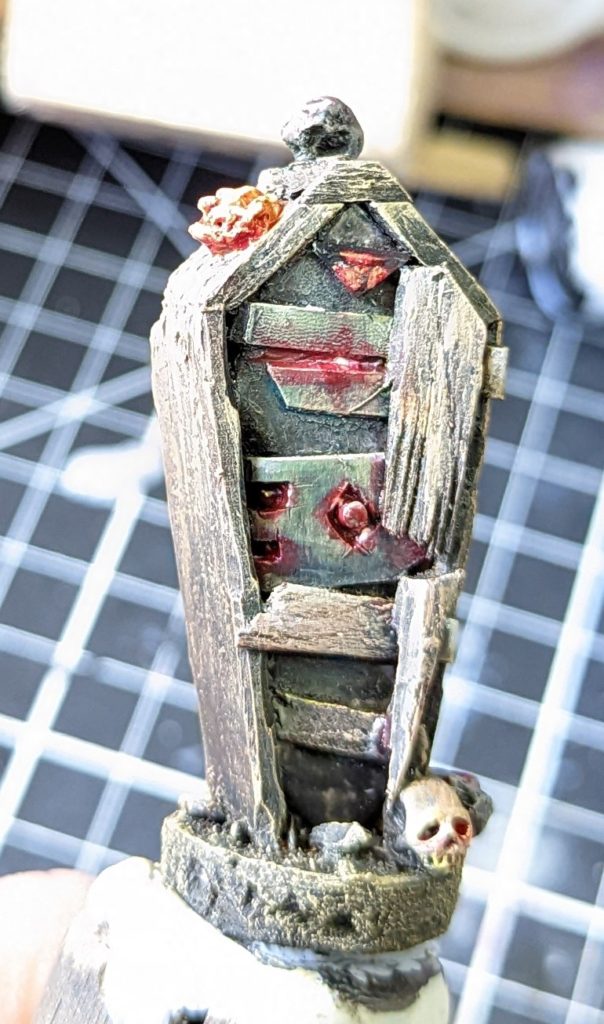
Throw #4: Reinforce and fill gaps
I covered the gaps with some greenstuff: putting a thin layer over, using a sharp knife to draw a seam between the 2 boards, then carving grain into it. I used a blunt hobby tool to ‘pull’ the grain outwards over the original wood, which blended it together.
To fix the weight and strength issues: I found a screw that was long enough to reach the ‘shoulder corners’. The head would pull the centre of mass towards the bottom, and just having the weight through the middle would keep it stable. I carefully drilled a pilot hole, drilled ~5mm in with a thicker drill to recess the head, then screwed it in.
Assess: the modelling was done, time to move on to painting
Throw #5: Painting
With all the modelling finished, finally, no more to see, it is time to paint
This isn’t a painting tutorial, and I wanted to keep things simple & muted.
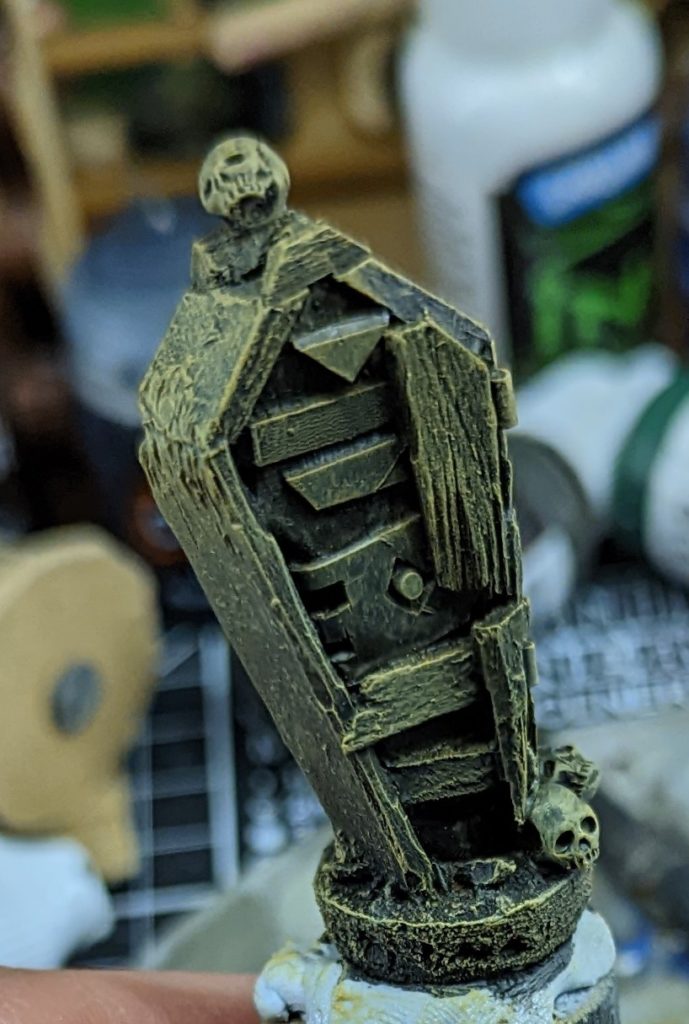
Started with a black primer, then a heavy drybrush on everything with Army Painter Desert Yellow. Follow up with a lighter drybrush of white, focussed on the edges of wood but heavier on the central coffin.
Paint some lines of desert yellow to accentuate the wood grain, then glaze the wood with P3 “Brown Ink” (which is more red than brown).
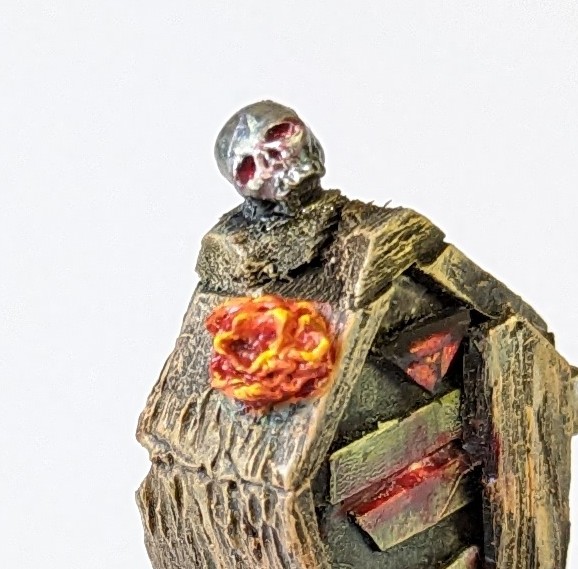
I glazed some coal black (greenish tinge) into the shadows of the centre coffin, this triggers subtle complementary colour effect against the red wood and glows. It also clearly makes it read as a different material, a dull metal.
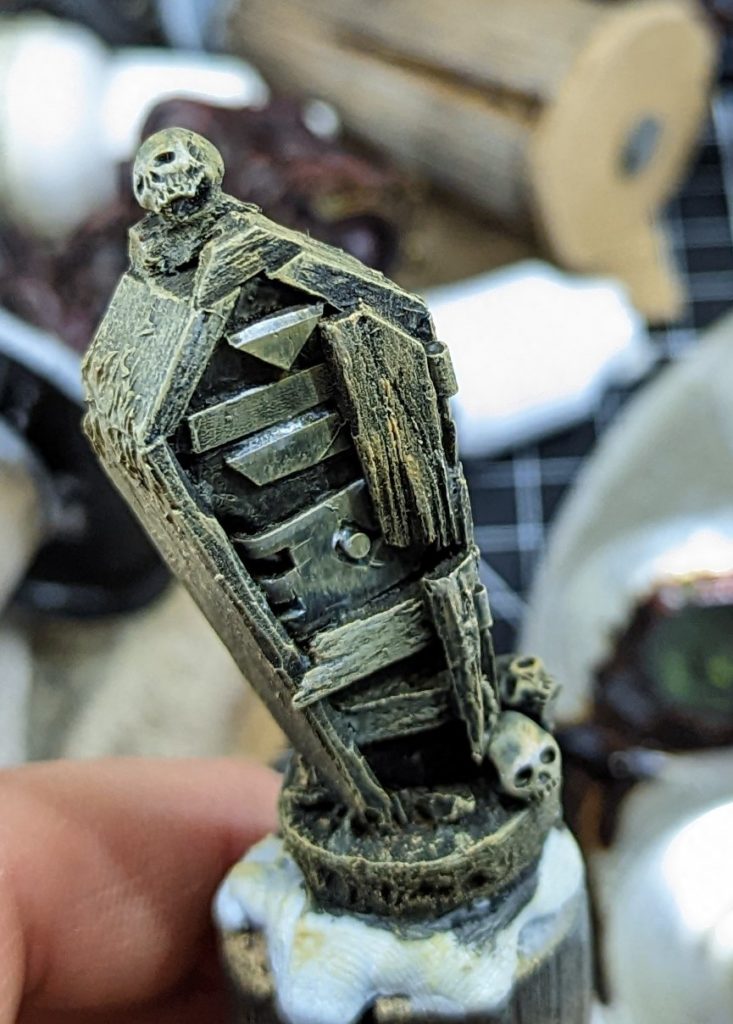
I tried a freehand of the AC logo, but found it more difficult than expected. In particular getting the red bright enough without making it ‘glow’ too much. I made do and moved on.
The red glows started with dark red, some white lines in the centre, red ink, then another white dot at the lightest point. I used red ink around the glows to do a simple OSL.
Skulls painted with some in bone and some metallic – as befits AC disciples.
With that everything was done, no more to see…
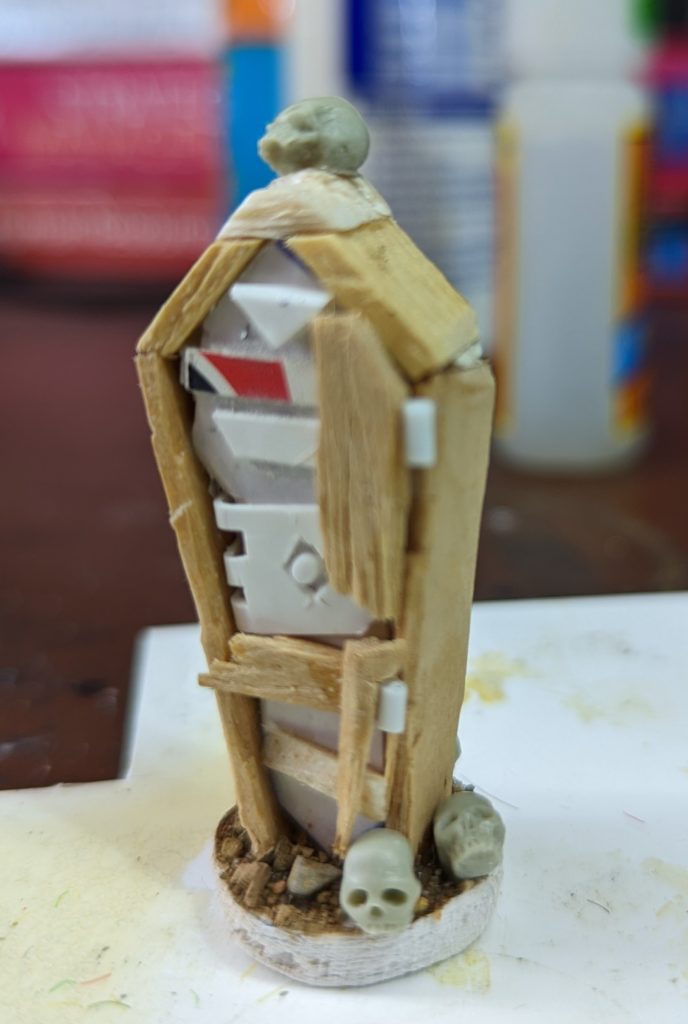
Throw #6: Day of the dead
ok, so I realised late in painting that I was past Halloween, but Day of the Dead was still around. Some of the ideas of Day of the Dead seem like they would fit the AC: a form of ancestor veneration. I also thought a bright orange flower would look neat.
I have sculpted things after painting before: usually in similar flights of fancy that come to me while I’m painting. Only catch is to be careful, use a brush on primer, and can’t use vaseline or filing too easily without stuffing up the paintwork.
The flower is sculpted from green stuff: I shoved a ball on, poked regular holes into it with a sculpting tool, then pushed and pulled them into petal shapes. I used Marigold flowers as a reference and think I did ok for a quick job. Primed with black, then white paint (I don’t have brush on white primer). Paint was a Vallejo bright orange, shaded with red ink and a light brush of yellow over the very tips.
Throw #7: Final spookiness
This one was always in my plan: the bottom needed to be covered in spider webs. These are cotton wool: pulled to light ‘sheets’ and pushed into place at the edges with a brush tipped in PVA glue. I tried to keep the glue away from the centre to keep the wispiness intact.
From here, you can see if I have achieved my vision “a 20mm based objective that has themes of both Warcaster and Halloween” … and Day of the Dead
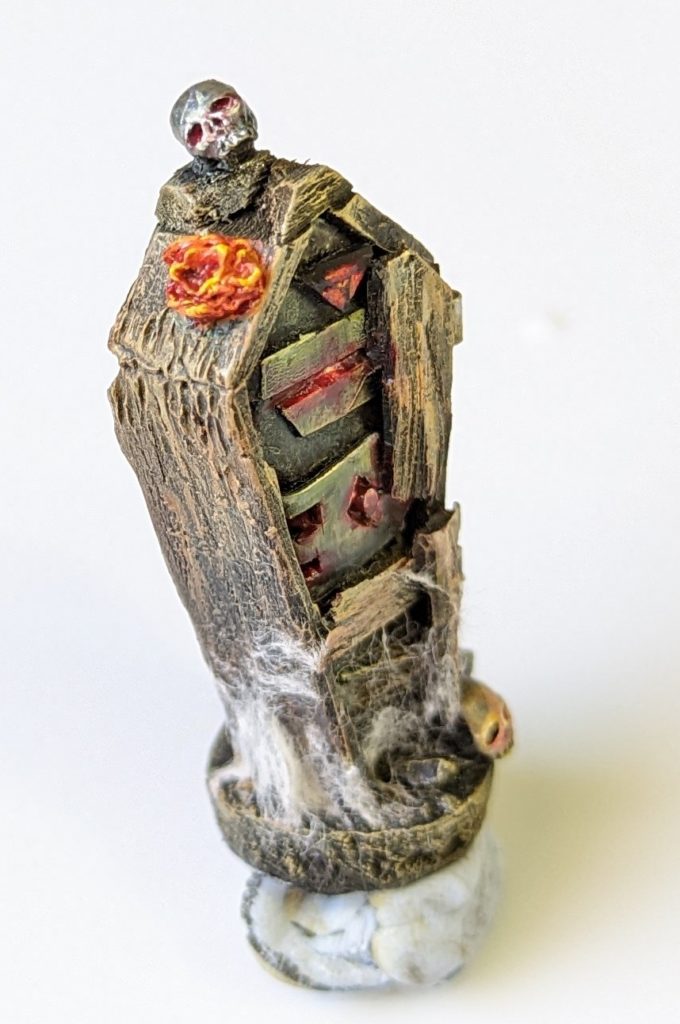
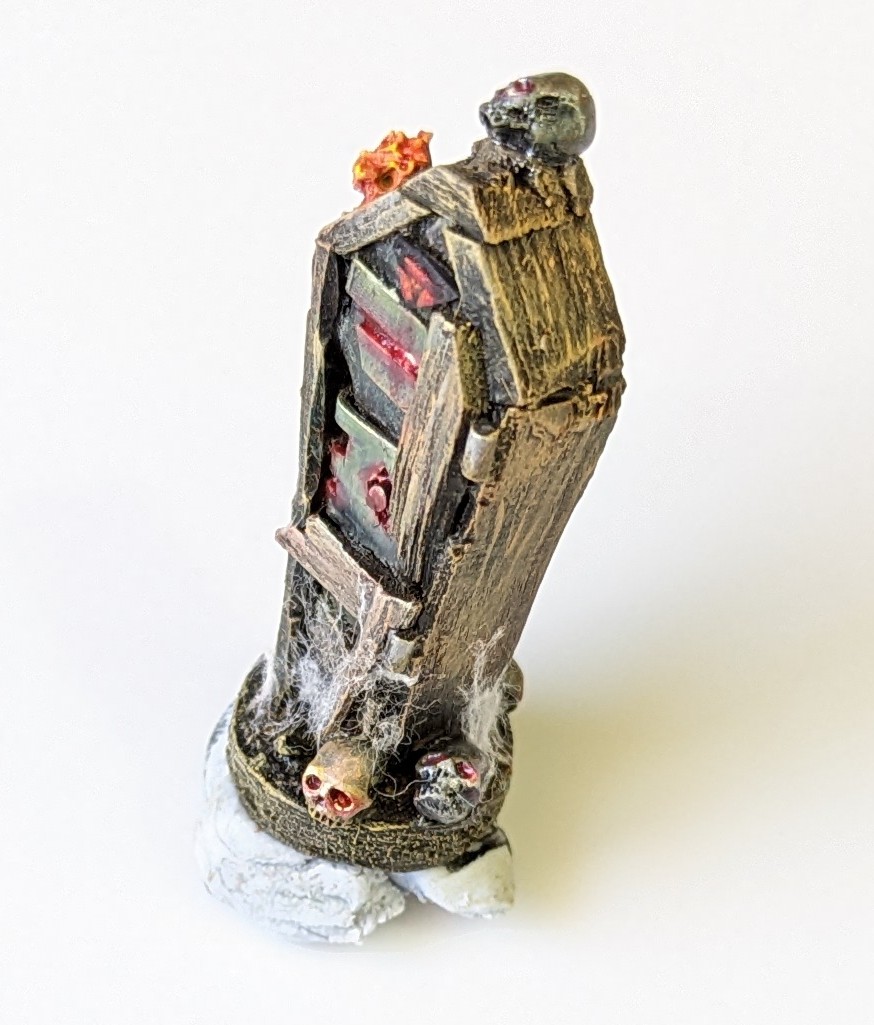

With that I was done. I hope you enjoyed the story of my process, and that it inspires others to try some creative scratchbuilding. This hobby is for fun, and the journey is where that happens. Keep in mind the spirit of experimentation, and make yourself some happy little objectives.