The case for Heavies
Firstly, I think heavies have a great place in Warcasters strategic mix. They are the most potent offensive and defensive pieces in the game, which is important in a game with limited activations, and they stack 3 arc really well. Being so powerful, they can make good use of cypher effects and support buffs.
However, at 4 DC they are the hardest models to summon: leaving a lot of arc in void gates (and not empowering other models or furies) and can be disrupted if an opponent shoots void gates down. Despite their power, they often aren’t worth the trouble of resummoning by the mid game, preferring to just deploy at start of game. Between arc on gates and the heavy itself, it can leave the rest of the army unsupported.
This makes them high risk high reward pieces that majorly interact with all the main rules of warcaster (summoning, objectives, arc management, limited activations, support solo)
How to counter
Heavies are rightly feared, and there are no guaranteed easy ways to beat them. Rather consider a toolbox of options. You don’t need all of these, just be aware when list building to give yourself a handful of ways to handle powerful pieces.
Firstly: Warcaster is an objective driven game. Heavies are hard to kill, and can kill a lot of your pieces. But if they aren’t threatening or holding an objective they can be ignored. If they aren’t in a relevant position, move away and they have nothing to do. They can also only be in one place: it might be worth abandoning an objective near a heavy and instead focussing elsewhere, especially if the heavy can’t actually score it (eg squad scoring with no squad in position).
Likewise if you threaten or shut down gates, you can force your opponent to deploy them in a safer position: behind cover or further away: take this as a win, as it is more difficult to stay relevant.
If you can relocate or slam them away from where they need to be, it stops them from being relevant. Bonus if you can slam them off the table for instant kill
Destroy them
Heavies have a lot of defenses, but can be destroyed. Your own warjacks (lights and heavies), well supported and with arc, big guns, or a fully powered fury can do damage. It can be helpful to look at your warjack weapon options and pick ones that could do the most damage against heavies. Most factions can build a light specifically to hunt specific heavies: a melee light is worth considering. Other models can also damage heavies: look especially at combat heroes, but anything at pow4+ or decent rat/mat should have a chance. Focus on destroying them as soon as they appear: before getting arc that often increases their defences and try to avoid giving chances to repair or tune up.
Damage high arc void gates
If an opponent starts putting out 4-5 arc gates, they are probably looking to summon a heavy. This is often the easiest time to swat the heavies: before they arrive. Use null attacks or just hit it to remove a couple of arc: if it’s at 3 or below heavies can’t come through it. Abilities like Gate Jammer on Voitek Sudal also make it that much harder to summon a heavy.
Note To guarantee this: you need to get it to 2 arc, as at 3 they can charge to 4 in their next turn: however there is more opportunity cost in this since that may leave their activations without arc.
Null effects
Warjacks often rely on arc to defend themselves and maximise damage. Null effects can remove that arc, making them more vulnerable. Likewise, null weapons can be used to reduce arc on gates, making it much harder to deploy heavies on the table. There’s plenty of good options: beyond the flashy null cannons, there’s null grenades on quartermaster or ranger fire team (both great for a few hits on a gate), regulator hammers, and a fury available to all factions.
Activation tokens, Cryo lock
Some abilities, such as the crypt lock fury, can put an activation token on a model. This is another great way to stop the warjack doing its job: if it can’t activate then any effort put into summoning, charging and supporting the heavy is wasted. As a warning, there are also effects that can remove activation tokens, but you’re still putting your opponent through extra steps to use them to their full potential.
Continuous effects
With so much power in one piece, nearly any continuous effect can reduce them significantly. Which ones you use depend on your faction and what you have access to.
- Fire: reducing attack rolls can reduce their effectiveness quickly
- Corrosion: if you are looking to kill quickly, -1 arm is a good start
- System failure: most warjacks will have mostly ranged attacks, a lucky system failure could stop them attacking
- Lock down: if you reduce movement it is much harder to get them in position.
These effects are about making the warjacks less able to it’s job, rather than killing it. in a game like this, making a piece useless can be more impactful than destroying it, wasting resources and making them resummon it.
Remove support
Some heavies get a lot of their power from support solos, who may be easier to remove than the heavy itself. Each faction has a solo that can repair, and most can also remove warjack activation tokens and more. Think of the combat engineer or factotum. More info on these below.
Mantlet jail
This one was discussed on the discord and too funny not to include. If a powerful piece wanders too close to a gate, you can wrap 2 mantlets around it to stop it moving any direction. ISA can also gate launch or use cypher to place a gate right next to the target and immediately summon 2 mantlets. As a warning: strike raptor or nemesis can fly easily, and any warjack will have access to ascension catalyst cypher to fly out, but until then they have to kill a mantlet before moving.
Specific heavies
Below is more specific advice on the strengths and weaknesses of each heavy
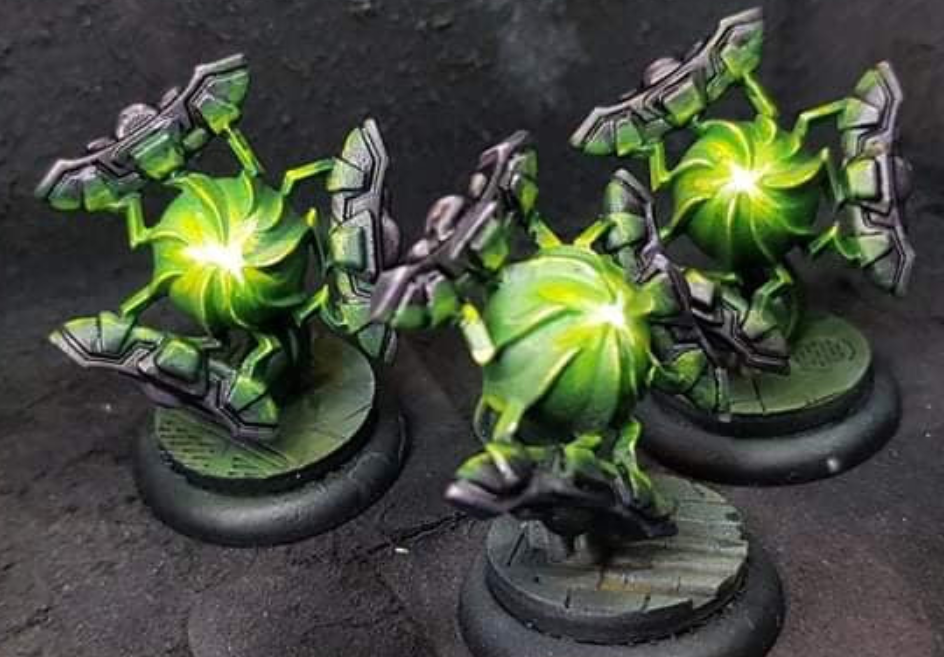
Empyrean Sentinel
Why it’s good:
- spike can ignore damage points, effectively making arc into extra HP
- A cortex with eclipse drive can prevent placing activation tokens, and the factotum solo can use jump start to remove an activation. This makes sentinel notorious for being able to activate every turn
- Has access to shields or Starfire array (+3 def against ballistic weapons) on the back. Combined with the spike makes it very resilient
- It’s weapon include a few ways to ignore los and cover
How to counter
- If you destroy the factotum and use Cryo lock, you can interrupt activating every turn: the cortex prevents placing a token, but can’t remove it
- Null effects are especially good on sentinel, since you need to drop it’s arc before it takes damage
- Once it has an activation token: decide if you can completely destroy or ignore it. If you can’t finish it off, it can recharge it’s arc or repair, meaning you need to start again.
- Continuous effects are as good as anything: fire or system failure might push them to not bother reactivating
MW Strike raptor
Why it’s good:
- Engineer is amazing support: with jump start for reactivating, and tune up to remove continuous effects and give tune up. While it won’t activate every turn like the sentinel, with engineer and cypher it can take more than its share of activations
- Good armour base, and defense increases with charges. Fully charged can be def 5 arm 5, which is pretty resilient
- Can spike for extra speed and flight, and at spd6 is faster than it looks already
- It’s weapons are among the highest damage in the game: with railgun and particle cannon. Blazer is also good, with fire, range and strafe
How to counter:
Weep: a fully charged fully supported strike raptor is one of the toughest pieces in the game
Now that’s out of the way, let’s look at options
- Kill the engineer: a lot of the power comes from tune up, reactivating, repair and continuous effects removal. Once that’s out of the way, normal options for controlling it are available: Cryo lock, fire, lockdown etc
- Null effects are good for killing it: there is a huge difference between def2 and def5 for doing damage, even with arm5.
- With focussed attacks it will go down. Even def5 arm5 is killable, and at least there’s not many tricks to avoid damage or transfer like in ISA or Empyreans
- Recognise that a lot of marchers power comes from the strike raptor: if you can contain, destroy or stop it summoning, they’ve committed a lot of support to a dead model

ISA Morningstar
Why it’s good
- Often run as a support piece, with gate crasher, ISA use it to summon gates and immediately swarm a region with other troops. Even without main guns, it can take 2 shields, bonus def against ballistic guns and just be a pain to remove
- Can spike to shoot if it is hit. It can also take hits from other models within 5″. The retaliation shot doesn’t need to be against the model shooting it, so can pick off models holding objectives, your next activation, or set fire to the attacker
- There are 2 useful support solos: automech can remove activation tokens and repair, or paladin Weaver can fully charge it with arc.
How to counter
- At def3 arm4-6 (depending on shields), he is among the easier heavies to destroy. Importantly, there’s no major abilities to make those stats higher. Only concern could be other models (paladin defenders) absorbing a key shot
- Any of the normal options are there: continuous effects, Cryo, null to stop retaliation shots, keeping him away from relevant places.
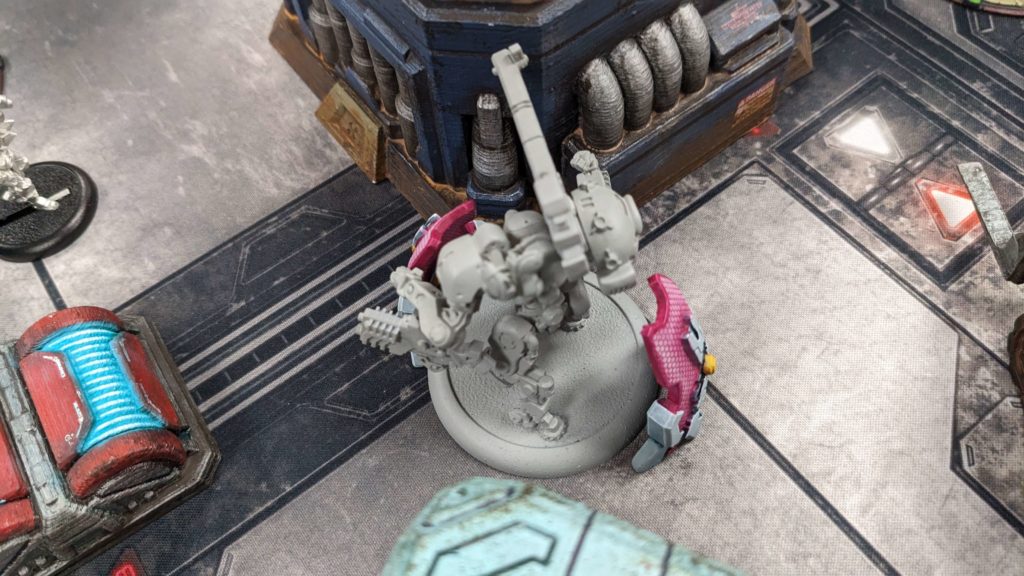
ISA Headsman
Why it’s good
- Everything about why he is good is under the ‘eye of sorrows’ weapon. High pow, spray, strafe, and can reduce targets armour. This is a powerful attack that can hit many models in one go.
- Thusters give it +1def for each arc
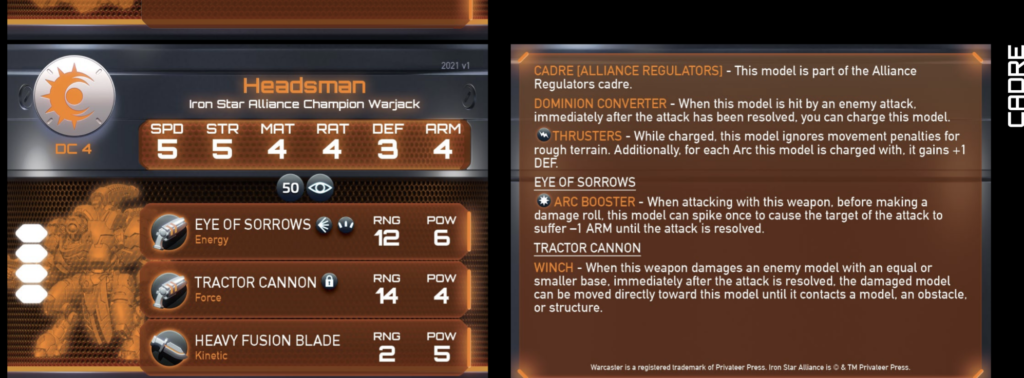
Counters
- So there’s no modularity giving more abilities, not too much defense, arm4. Probably one of the easier heavies to kill: not easy, but if you equip to take down a strike raptor or sentinel you should be able to handle this
- Likewise, nothing to stop continuous effects, blocking it, using null to reduce def.
AC nemesis
Why it’s good
- Afterburners can let it move 18″, at the cost of arc and not attacking. It can get anywhere, and is good for taking objectives or key buildings turn 1.
- Base flight: lets it rain bullets down on you, gives bonus def dice against melee, and makes it manoeuvrable.
- Anything that can do dual hollowphage corrosion is worth taking seriously, and with higher rat than a scourge. It can also take a high pow slam shoulder cannon
- It gains arm against shooting and fury for each arc. At full arc it is def 3 arm 6 against shooting.
- The above abilities give a few different defences against different attack types
Counters
- So… base def3 arm3 is very very bad. While it has abilities to add to this, there are gaps
- Null drops the arm against shooting
- Flying melee attacks can expose the poor base stats: a melee warjack with Ascension Catalyst will do it
- It needs full arc to survive, which makes it divisive amongst AC players who usually prefer extra arc in reserve for furies. If it gets continuous effects that stop it doing anything useful, it can be dead weight for arc
This is a really great explanation of Heavy Warjacks in the game! This aligns with my feelings on Heavy Warjacks at the Skirmish level really well.
I have come to feel like the value of a Heavy Warjack changes a lot when you go up to Mid or Primary games, though. In Skirmish you can leave arc on a Heavy Warjacks easier, since there is less models in your army and less board space to stretch them across. Heavies still lay waste to stuff on the full board, but are generally doing so at the cost of activating another unit that could actually score the scenario. Coupled with the high DC it is harder to justify them for me on the big board scenarios.
Pingback: Divine Tempest Deep Dive: the Holy Storm - Arcane Synthesis