Time to deep dive into arguably the most potent and complex single model in the game: The Divine Tempest. This will focus on her stats, how to use her and finally how to play against her.
Divine Tempest’s Rules
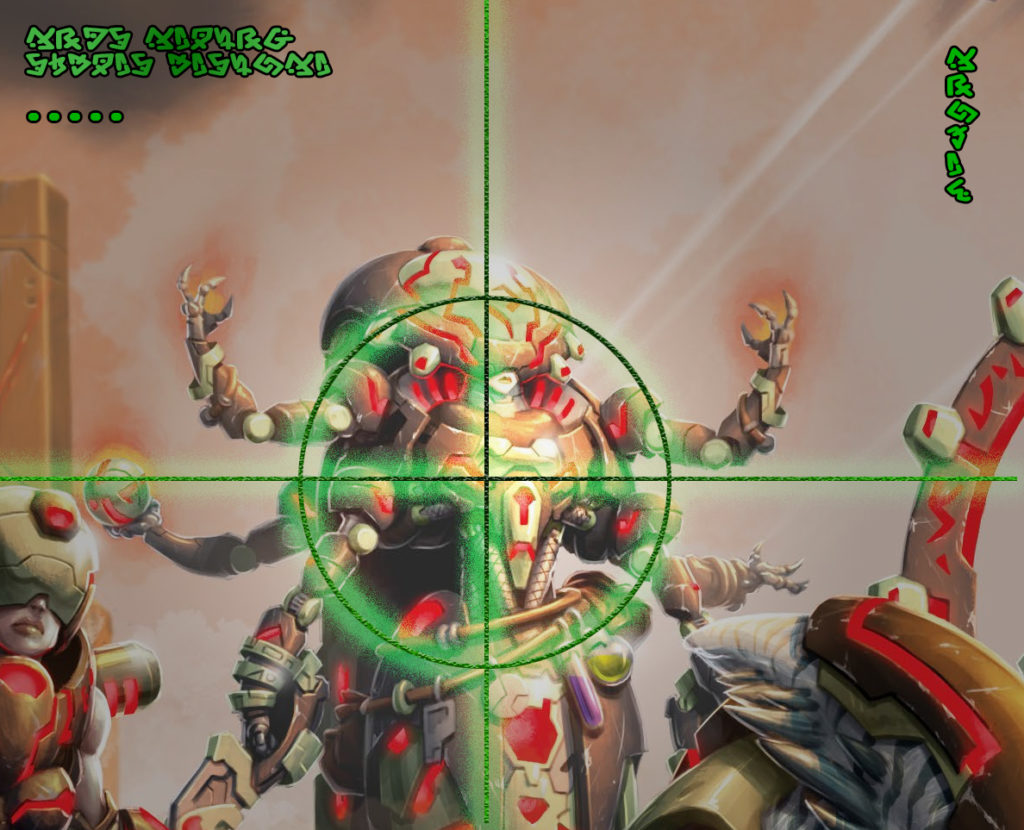
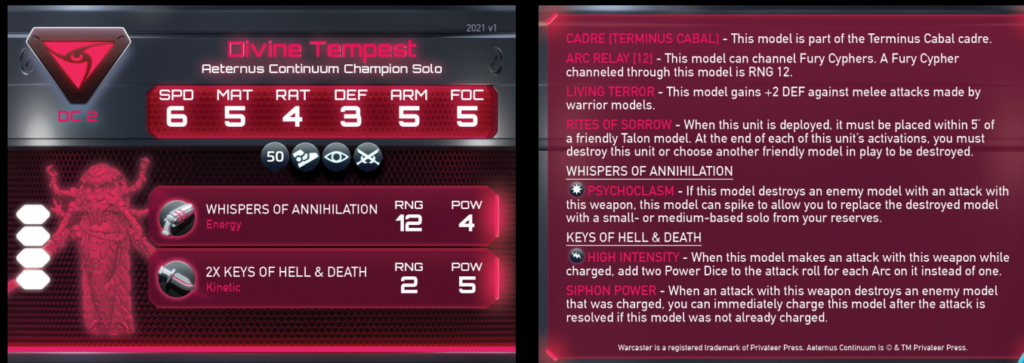
So first, her rules. Her stats are huge, very near to heavy warjack levels of defense, and a melee-centric offense just short of heavies too. As a non-hero solo, this is great value for the ‘free’ solo activation. She earns her title as the centre of a Divine Storm of blades.
- 2x Weapon expert Melee weapons at mat 5, pow 5 high intensity are very good, capable of destroying anything in the game in melee
- Def3, Arm5, 4 HP with living terror (def5 against melee warriors) probably means it will take a dedicated effort from a warjack to destroy
- Arc relay as a weaver in case that is needed
- Psychoclasm lets you spike to summon a solo if you kill someone with your pow4 gun. I’ll go into more on the tricks here later: at rat4 pow4 it is good but not guaranteed, so you might need to pick your targets.
On the Downside.
- She has to sacrifice a model after she activates
- She is difficult to summon, DC2 is more than a typical solo (although a steal for a warjack statline), and she has to be deployed within 5″ of a Talon.
We’ll come back to these later… one is more often a strength and the other can be worked around
Support
To bring the Divine Tempest, you need the rest of her cadre, with DT being the additional ‘free’ champion. These are all good models, but the ones that directly support the Divine Tempest are her handmaidens, the Talons. When charged, they also let the Divine Tempest avoid an activation token and go again next turn. By adding the Relikon, they let the DT charge at the start of her activation, getting High Intensity easily and giving her arc to spike for Psychoclasm. Talons are also numerous enough to be solid fodder for her sacrifices, and no slouches in high speed melee combat and arcing on their own.
Other relevant support models
- To make use of Psychoclasm, you need strong small and medium based solos: these are all outside the cadre. Marauders and Vassal Bosses are convenient combat solos, but having another weaver or grafter won’t go astray.
- The Grafter’s Adrenalizer can give her another +1 arm and clear continuous effects. He can also heal any damage, and resurrect your squadmates if DT sacrifices too many
- Synturions can self sacrifice to take any attacks that are solid enough to hurt the DT. They are required to be in any DT list, and are a solid option for holding objectives in their own right.
Strategies with Divine Tempest
Sacrificing is secretly her best ability
Rites of Sorrow makes you sacrifice a model. Choosing to kill your own models is actually a good thing in Warcaster – with it working like a recall most of the time and giving you flexibility. Some examples
- You can use it to trigger a ready phase: by sacrificing the last model who hasn’t got an activation token.
- Free recall for a non-hero: of a damaged solo, or one suffering from a continuous effect, the last model of a squad, or one in an irrelevant position. If you would otherwise have a useless activation, it is better to return it to your reserves and summon again.
- Dirtiest of all: if Living Phaetheon is on the board, you can sacrifice him to activate the more powerful wraith form.
While there are times where you won’t want to destroy your own model, in these cases you can usually sacrifice a vassal or talon and not suffer too much. But look for the opportunities and most of the time you would actually prefer to lose a model.
Recurrent Apotheosis
Summoning is difficult, between coordinating with Talons for Rites of Sorrow and 2DC. However, Recurrent Apotheosis cypher gets around these restrictions, as the model is “replaced” rather than “deployed”. It costs no arc and doesn’t need to be near a Talon. You can also activate straight after: start your turn with a Vassal who morphs into a surprise DT in the face. This card turns off most of the downsides of Divine Tempest.
Recurrent Apotheosis causes you to lose a model, but as before this can be an opportunity a lot of the time – for clearing a crippled solo or the last model in a squad. Just don’t try it on living Phaetheon: since you can’t put both the DT and Wraith in the same spot on the board, one will die.
Surprise Objective Grab
DT can single handedly take an objective from a long way away (or even not starting on the table). Use recurrent apotheosis to turn a weaker model to a DT, then advance and use Psychoclasm to kill an enemy. Summon a marauder, and immediately activate him and walk him onto the objective to kill any enemies. They then need to work out how to deal with a Marauder and DT who came from nowhere to take a flank, with a series of double moves. It feels really good if you can kill a model holding the objective, and immediately replace it with your marauder – without even activating him.
Countering the Divine Tempest
So what are your options if you need to fight an enemy DT? Like all things in Warcaster, is is often better to limit a model rather than than killing it. I’ve compared DT to a Heavy Warjack, and a lot of the same principles apply – continuous effects, and playing around key cyphers such as Recurrent Apotheosis can help limit. “Stun” effects that put an activation token on her (incl Cryo Lock) can be particularly good, as only Encrypted Command cypher can remove an activation once it is on (and not all players have it).
Breaking her support can help too. Talons are priority number 1: if the DT is in the thick of combat, it is vital to break the chain activation. Shutting down the Relikon’s free charge is also essential, as it makes it too easy for her arc flow (free charge, 2 sword swings with HI, then a Psychoclasm gun to spike). If you are looking to kill or put continuous effects on, the Grafter is a priority. And be aware of Synturions if you are lining up a high power attack on the DT – it may not be worth killing the Synturions, but a null effect can disable their self-sacrifice.
If she is at a distance you can sometimes ignore her. While the range 12 gun with Psychoplasm is dangerous, she really needs to hit things with her High Intensity swords to have the most impact. A DT who is just shooting is a long way from her full potential.
Stop her summoning – play around Recurrent Apotheosis
Without Recurrent Apotheosis, it is really difficult to bring a DT to the table. The Talons and gate both being there for a turn are sitting ducks for an opponent who wants to prevent it. If you see them in formation (A spot within 1″ of a gate and 5″ from a Talon), do what you can to pick off the Talons or knock a few arc from the gate (esp if you have null weapons). If you see a gate with 4-5 arc, it is possible to summon Talons and DT in one turn, but knocking the gate below 4 makes it more difficult.
Once an AC player uses Recurrent Apotheosis, that can be a good time to kill the DT. You probably won’t see the DT again until next time the Cypher deck is shuffled (although Raxis can fish it out if he chooses).
If Divine Tempest isn’t on the table, you can use Harlan Sek’s technomancy to try to remove it from your opponent’s hand.
Kill her completely if you try
It doesn’t feel good, but you probably need Warjacks or ranged heroes to take care of her. But if you do decide to kill her it is better to overcommit and remove her than to only chip a little damage away. Grafters can heal or clear any continuous effects if you half do the job.
Furies with a lot of arc can also deal with her – getting around living terror and hitting with enough dice to knock a few damage off.
Fantastic advise and perspective! Aligns perfectly with my own experience against this model.
Those DC2 “heavy” solos are really a must-include for me in any army, but the Divine Tempest definitely pushes that envelope even further. The way she synergies with the rest of her cadre is really the extra magic to her.